
Calvin is turning four this March. It seems both an eternity and an instant since he was born. When I asked Calvin what kind of birthday party he wanted, he said that he wanted a Lego party. Several years ago I had stumbled across a blog which had detailed instructions on how to make a Lego mold. Calvin’s birthday party seemed like an excellent excuse to try it out for myself.
My first hurdle was figuring out what type of silicone to use. Crafty Girl said she used Smooth-Sil 940 because she found some locally but liked the idea of Copy Flex better because it didn’t require as much math. Math doesn’t scare me but I couldn’t find any Smooth-Sil 940 in my area, or I was looking in the wrong places, and Copy Flex seemed easier to order in small batches.
I wanted to use the Legos to spell out “Happy Birthday Calvin” on his cake. I counted up the pieces and, using two 10×10 base plates, laid out the Legos I’d need. Then I did the math and discovered that using two base plates would require at least 4 lbs of silicone. Let me tell you, silicone is not cheap. 4 lbs was completely out of the question. After some changes, I decided I could get all the pieces I wanted from one base plate if I filled it up twice. I ended up with 40 2×4 pieces and 10 2×2 pieces and a couple spares to fill out the small amount of empty space left. This still required 2 lbs of silicone though.
I hunted around on Amazon and ebay and found some pre-made Lego-like mold options. However, the comments for all the molds I could find invariably said they weren’t standard Lego brick size. This was a problem because as it was, my Lego letters were barely going to fit on the cake. I went back to the Copy Flex website and asked myself if it was really worth the $50 plus $12.93 for shipping. If I had found the perfect Lego mold and saw the price tag was $62.93, I would never have bought it. However, somehow I managed to convince myself that this was a good investment because it was educational. We’d get to see chemistry at work! I ordered the silicone and waited with baited breath for it to arrive.
We had a couple of false starts. I had made the Lego base but Jaeger, correctly, suggested that washing the Legos would be a good idea. So, we ran the Legos with the base plate through on the top rack of the dishwasher with heated dry turned off (this is how we routinely wash Legos/Duplos ordered on eBay). The next day we got ready to pour only to notice that the Legos had collected water inside and so weren’t truly dry. *sigh* We took all the Legos apart and laid them out to dry on cooling racks. Finally, everything was ready.
Copy Flex comes in two containers: a catalyst and a base. The Copy Flex instructions suggested that refrigerating the two liquids would help slow down the reaction and provide more time to get the mold right. Other than being a little larger, I had constructed the positive Lego mold similar to how Crafty Girl had. I had tested it out with water and noticed the water leaked out so I worried that the silicone would also. To prevent an unexpected mess, I put the Lego mold on a cookie sheet. Then I took the two parts of Copy Flex out of the fridge and carefully stirred them together, trying to minimize the bubbles. As instructed, I poured the liquid from a height of about 12″ and let it spread naturally across the Legos. 2 lbs was exactly the right amount, it was perfect. I thumped it on the counter a couple of times because it seems like there were still bubbles in it. I wasn’t sure if thumping was helpful but I didn’t end up with any problematic bubbles.
Copy Flex cures within 4 hours but it was evening so this morning I woke up to take the Legos off. The silicone had leaked in a couple of small places but overall it wasn’t too bad. Interestingly, it seemed to be the places where I had made the border with Legos larger than the standard 2x4s. As Crafty Girl had promised, they peeled right off. I washed the mold with soap and water because Amazon reviews of the pre-made molds had mentioned that the dishwasher could leave a residue that would end up on the candy. The silicone is safe up to 400 degrees F so I stuck it in the oven for a couple of minutes to dry.
This afternoon, Calvin and I tried making our first Legos candies. I used Wilton Candy Melts and had bought several different colors. Walmart carries Candy Melts in their “wedding” aisle. Unfortunately, the candy melts are more pastel colored. I had tried adding gel fooding coloring to intensify the the colors but I didn’t have any oil-based coloring easily available so the melted candy kept seizing. Jaeger assured me it would still be ok and I’m trying to pretend the pastels are on purpose, maybe they’re the Friends Legos.
In any case, I melted the candy melts over a double boiler. You can microwave them but I felt the double boiler gave me more control and made sure they stayed melted. I used a small spatula to carefully fill each Lego slot with the melted candy. Wilton says the candy should be pudding-texture, because if you get it too hot, the candy is ruined. However, my later Lego bricks were made with a little more liquid candy and they turned out better. I would fill four 2×4 bricks and one 2×2 brick and then tap the mold against the counter, hopefully to get the air bubbles out. I wasn’t sure how fast the candy would set. I repeated the process until the entire mold was filled. Conveniently my mold holds exactly one bag of melted candy melts.
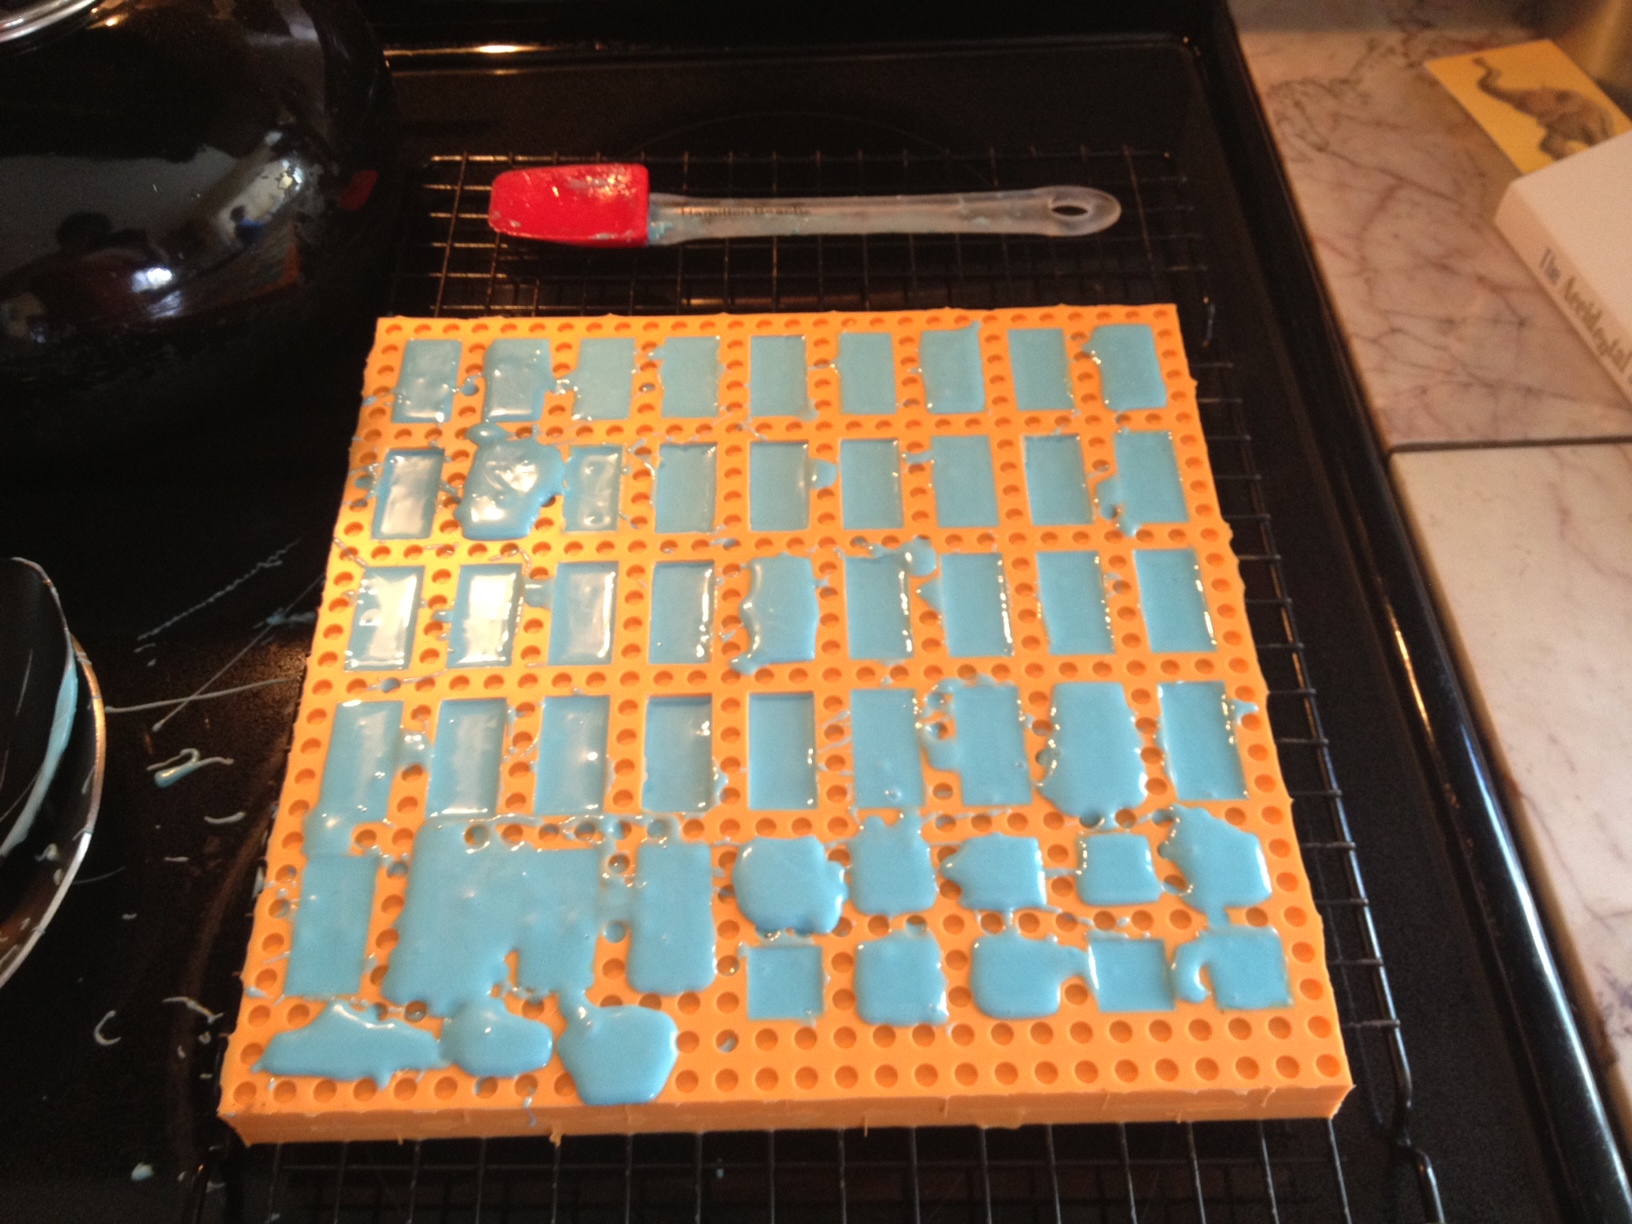
Here’s how the mold looked right after I finished filling it. You can see the small spatula I used.
I was unsatisfied with how some of the earlier Legos had overflowed so I tried to smooth them out but I think that was a mistake. I wasn’t sure how long it would take to have the candy set so I looked it up online. Common consensus was that 20 minutes in the refrigerator should work. I thought you weren’t suppose to refrigerate melted chocolate but maybe candy melts are different. In any case, after 20 minutes I took it out and the Legos popped right out.
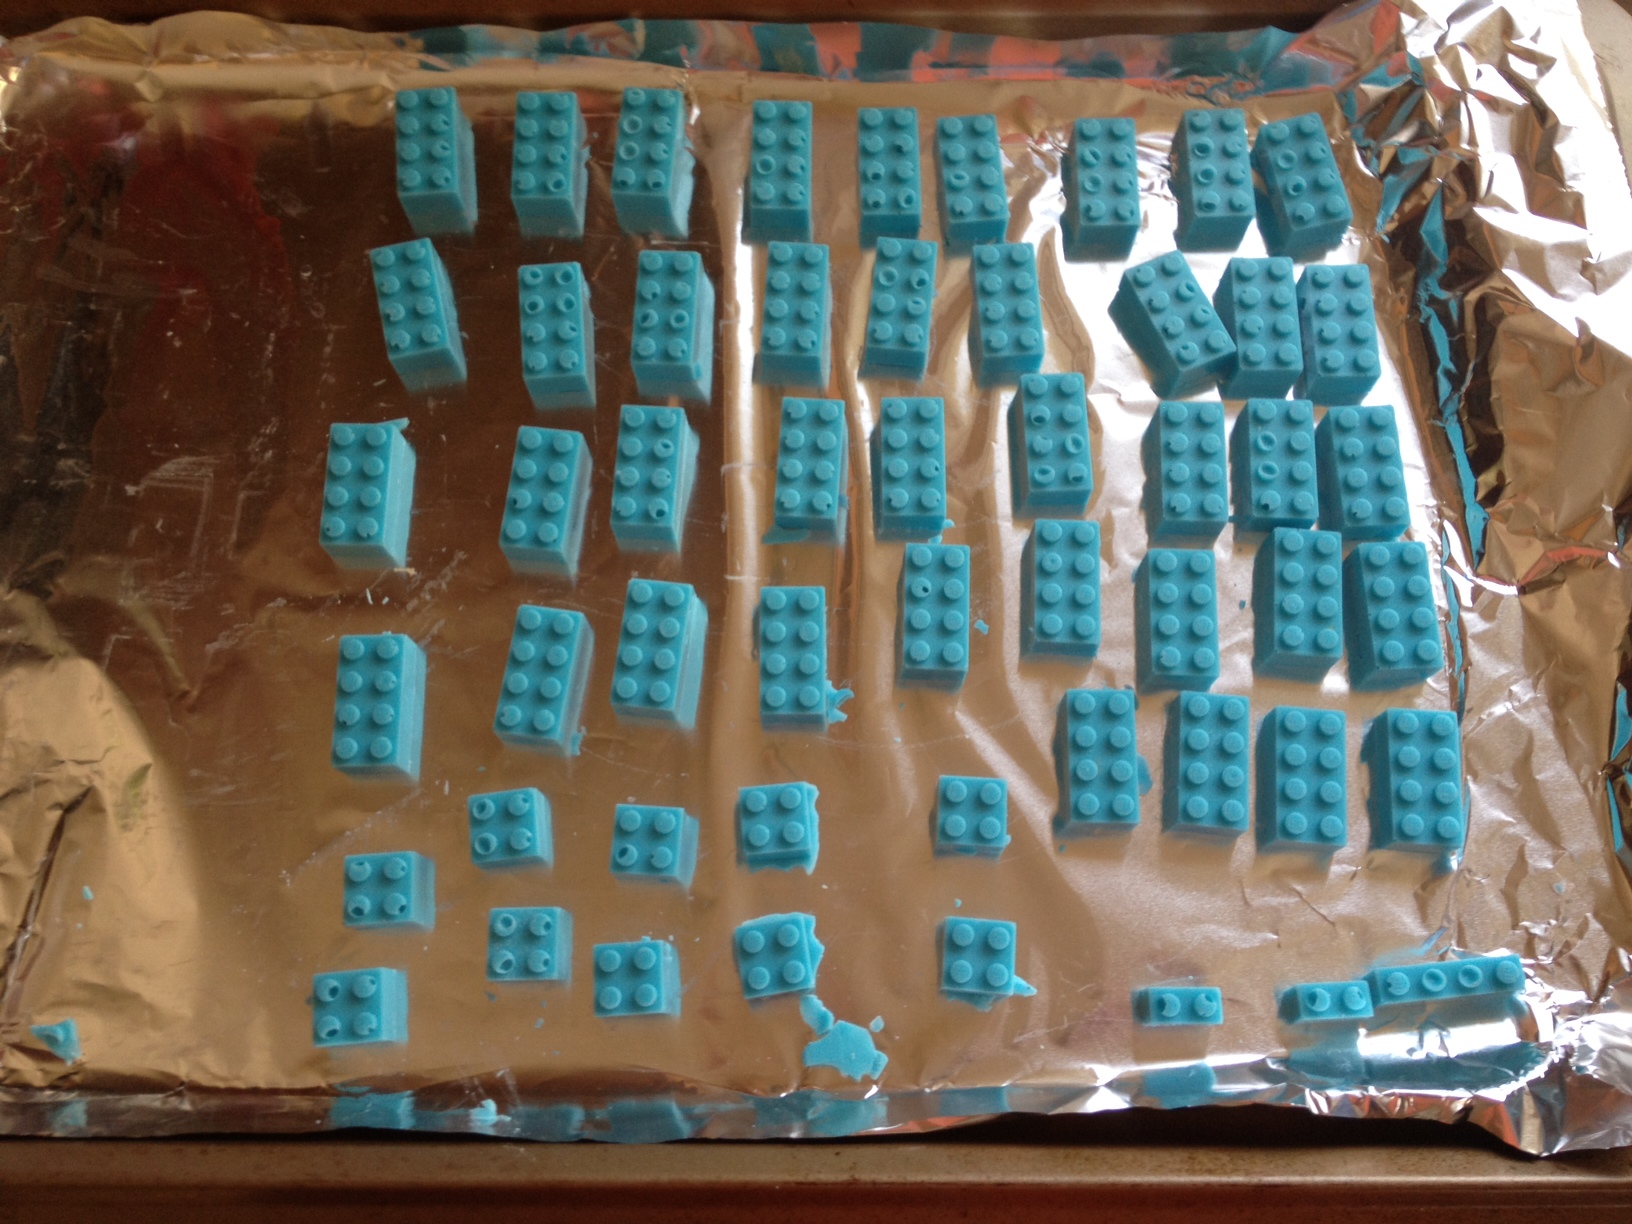
The finished product.
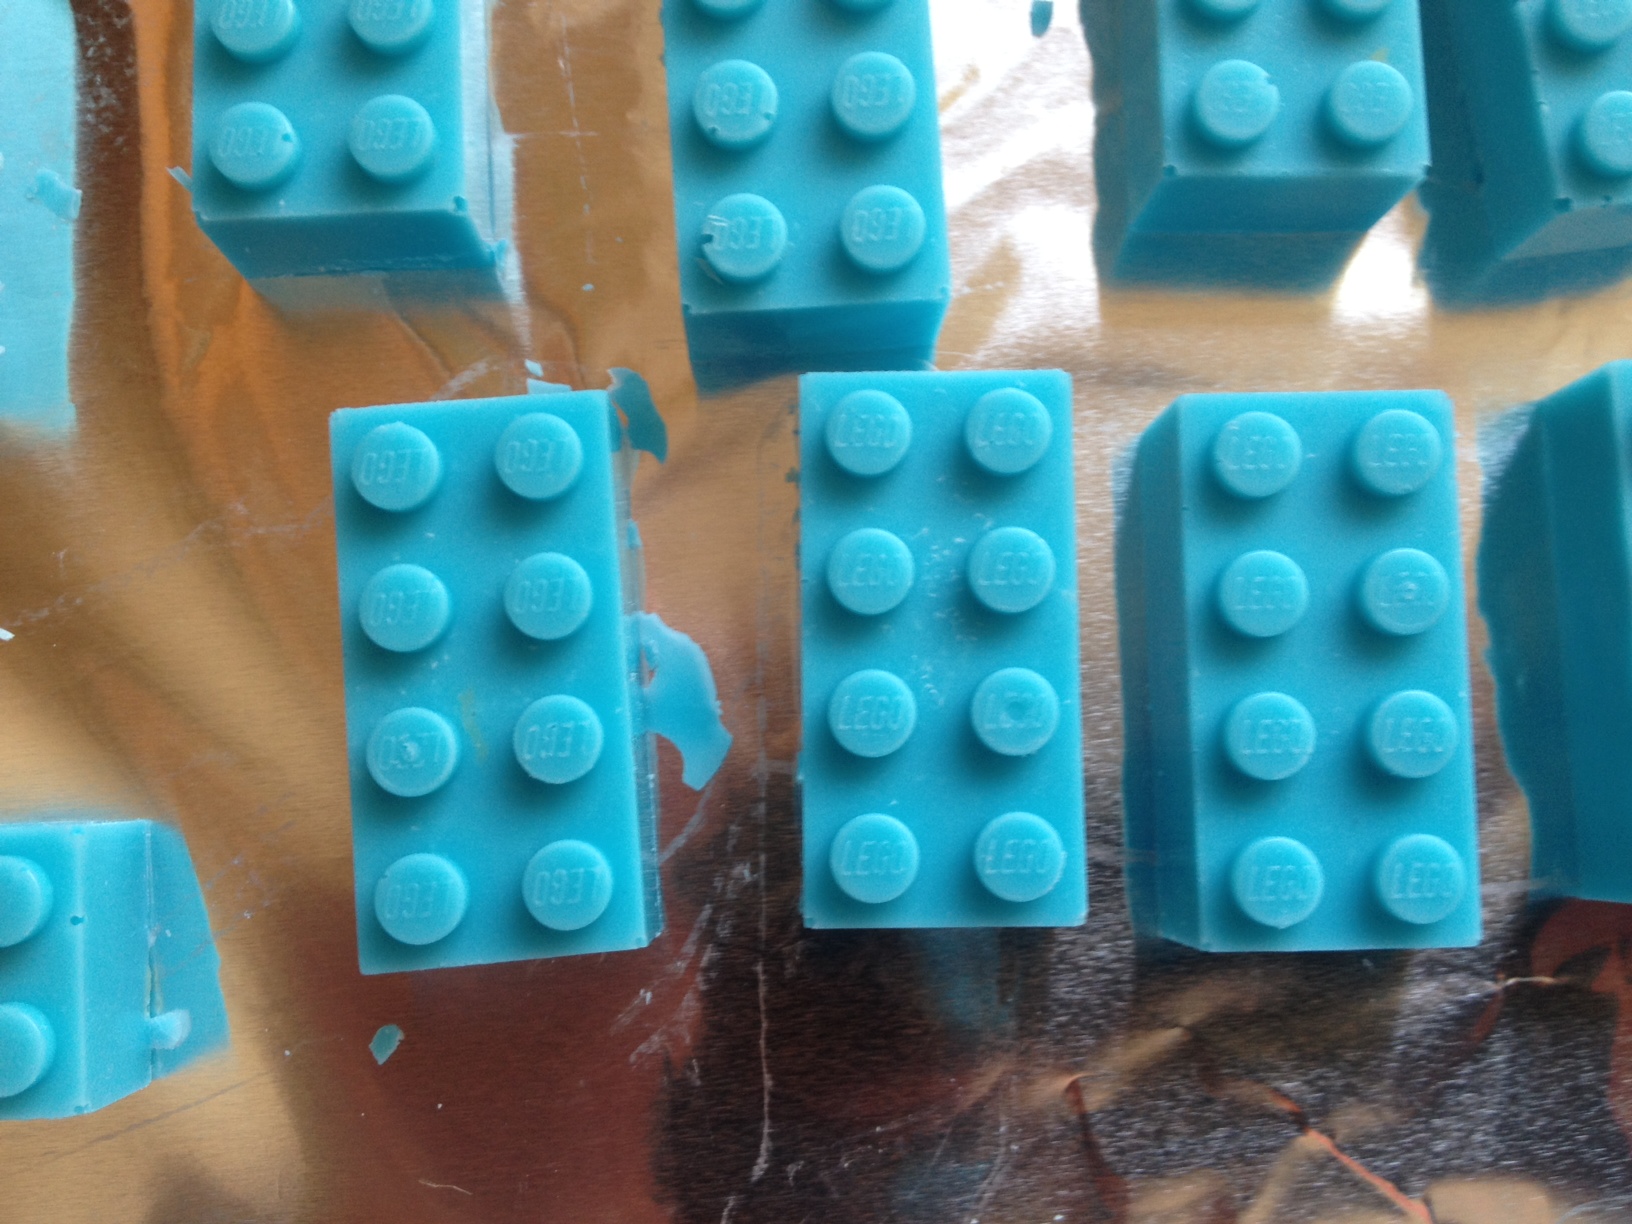
The detail is so fine you can even see the Lego logo on them.
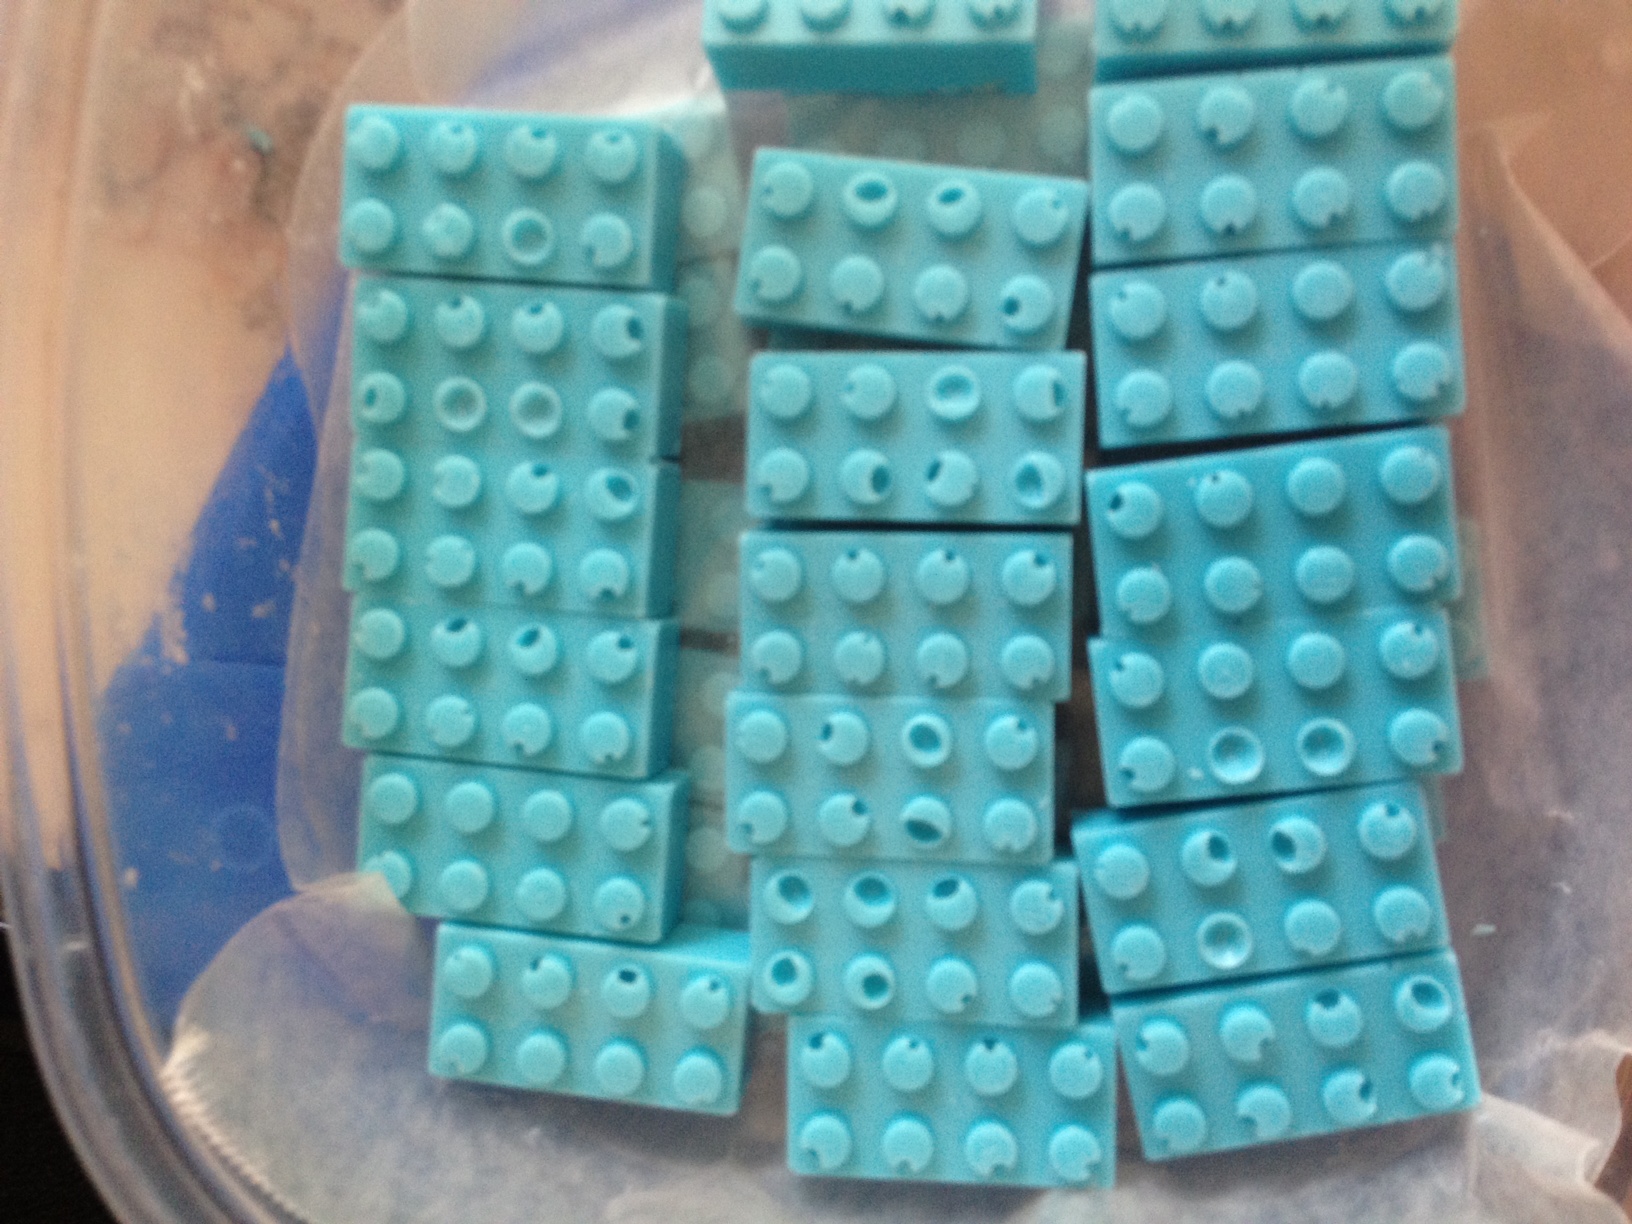
The first candies I filled tended to have air bubbles in spite of all the tapping I did. I think it’s because the candy wasn’t quite as liquid as it was at the end. Below is how it looks with the bubbles.
All in all, I’m pretty happy with how they turned out. They’re definitely recognizable and I think they’ll work well on Calvin’s cake. Calvin’s birthday isn’t for a couple of weeks still but I’ll post pictures of the cake when it’s finished.
Wow! Lego candies, how cool is that, and they are so real looking.
This is REALLY cool! It’s a fun idea, and you’ve done a good job.
Will this type mold you are using work with gelatin/corn syrup to make lego gummies?
Yes, it should work fine. From Make Your Own Molds (Where I bought the CopyFlex):
“CopyFlex is Outstanding to Make Molds For: Chocolate, Hard Candy, Gum Paste, Pastillage, Royal Icing, Candy Clay, Butter Cream, Marzipan, Sherbet, Sorbet, Butter, Fondant, Ice Cream, Pulled Sugar, Cheese, Ice, Gelatin.
It may surprise you to know that almost half of our mold making customers purchase CopyFlex for use with non-food materials. Reasons given are ease of use, high quality from a platinum based curing system and the peace of mind that comes from using a liquid silicone rubber that is not harmful, toxic or emits dangerous fumes.
CopyFlex is Perfect For These Non-Food Mold Making Applications: Wax, Clay, Polymer Clay, Plaster, Melt and Pour Soap, Precious Metal Clay, Cold and Hot Processed Soap, Casting Resin, Candles, Cold Porcelain, Plastic, Cement, Hot Glue, Low Melt Metals and More!”