
I’ve always dreamed of having a double oven. Granted, most of the time one oven is perfectly fine. However, every so often it’s really convenient to have the ability to either bake more things at the same time or to bake multiple things at different temperatures. Thus, I was really excited when we bought this house to finally have two ovens. One is a wall oven that is part of a microwave/warming drawer/oven combo and the other oven is part of a range.
After some experimenting, I determined that I preferred using the wall oven most of the time. The wall oven’s temperature was more consistent and it’s also nice to not have to bend when pulling things out of the oven. So, except when I needed a second oven, I used the range’s oven primarily for storage of my cast iron cookware.
For Jaeger’s 2021 birthday I baked a cake in the wall oven and it turned out beautifully. Then, immediately afterward, I put the Garbanzo Pot Pie into the oven and, 30 minutes later, discovered my oven no longer baked. Not fun but I really appreciate it waited to die till after the cake had finished.
Unfortunately, the wall oven is a Thermador and I discovered there weren’t any Thermador technicians on this side of the mountain. I did find someone over in San Jose willing to come out but he was booked out till late October. Fortunately, we had the range oven so this was mildly annoying but not especially inconvenient1.
The oven repair person came out at the end of October and told me that the element was fine which meant that the control board was probably dead. Unfortunately, Thermador doesn’t make the control board for this model anymore. So, my best bet was to pull out the control board and send it to a company that specializes in fixing oven circuit boards. I asked for a recommendation and he told me to just Google for it and something would pop up. This didn’t inspire a lot of confidence as many things pop up on the internet when one searches for random things, including scams. I did do some initial searching and confirmed that this was a thing that people do. However, it seemed like a lot of work and we did still have one working oven.
Jaeger and I alternate major holidays with our families. This year is Thanksgiving with the Logans. After some discussion, everyone decided to meet at our house. Given Thanksgiving is one of the times when having a double oven would be particularly useful, I started thinking about trying to get ours fixed. Except, I didn’t get around to doing anything about it until the microwave died.
The microwave is integrated into the oven system. Originally, it was a Thermador microwave but at some point it had been replaced with an LG microwave. One day Jaeger was microwaving something in the microwave and there was a loud pop. We don’t know exactly what happened but after that the microwave no longer heated anything. Unhelpfully, it would go through all the motions without providing any error message.
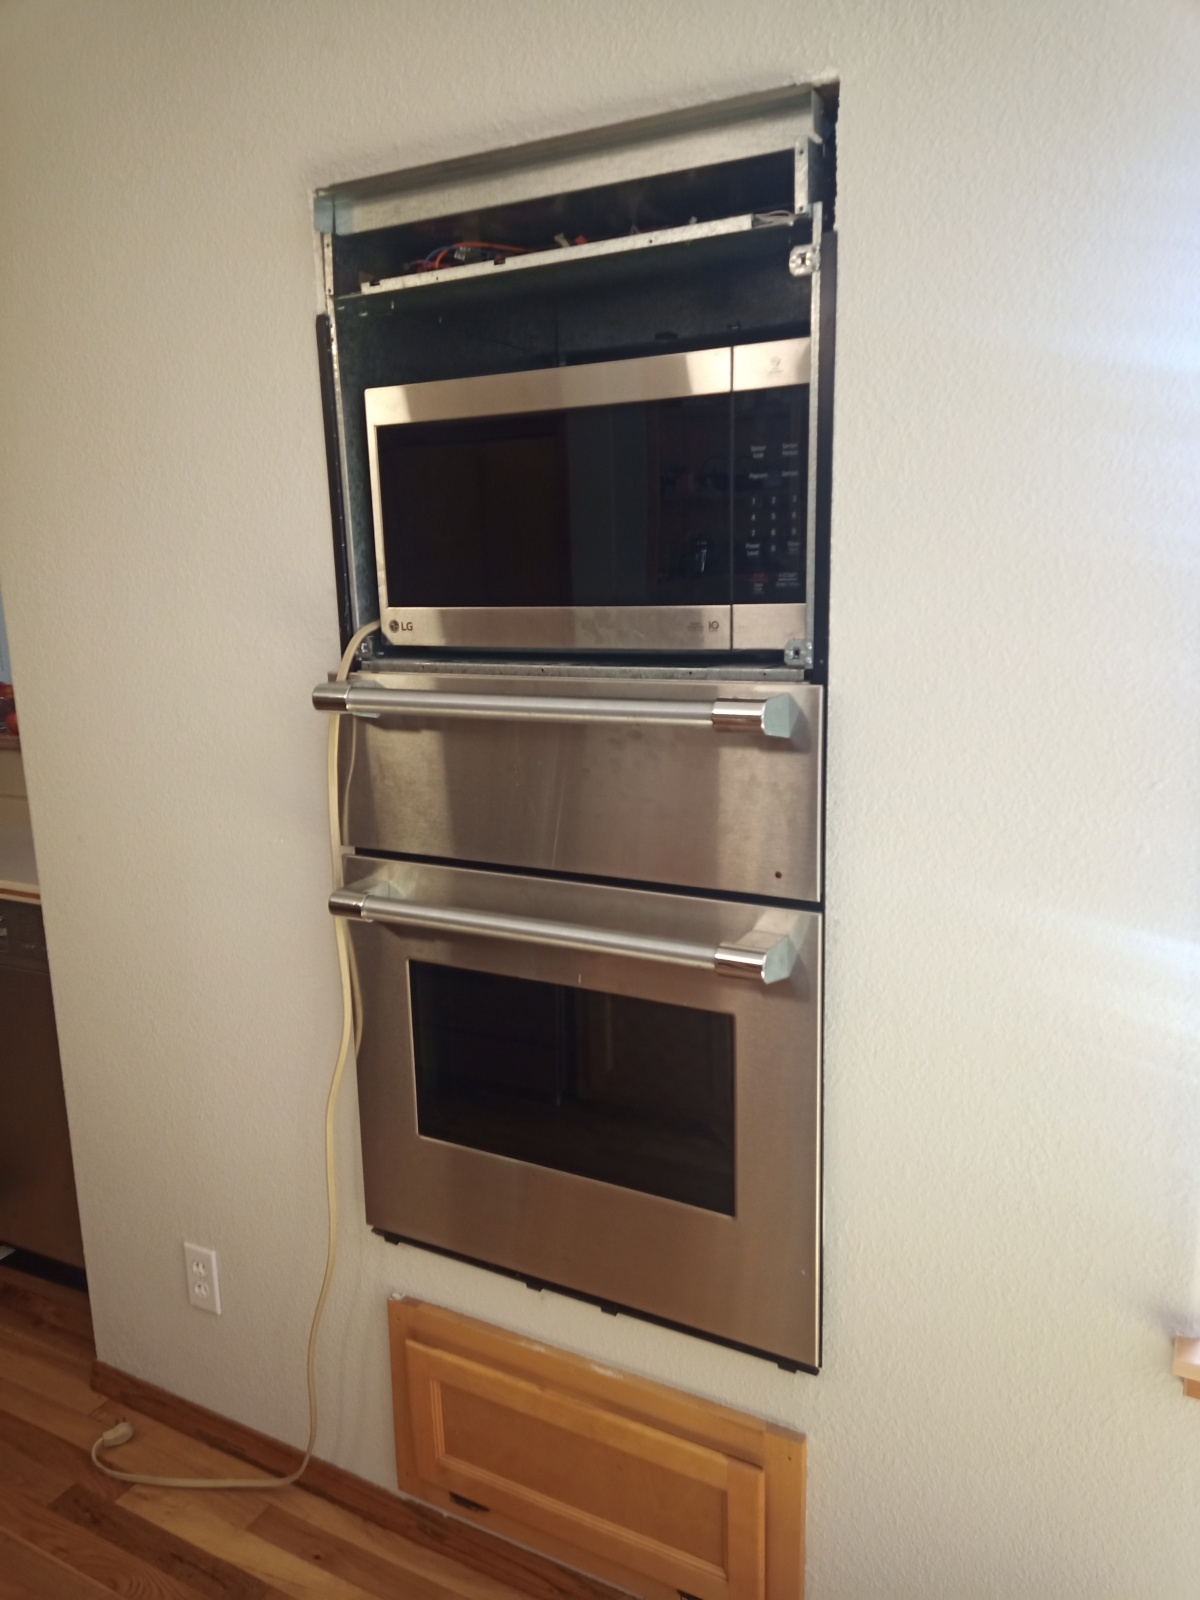
Unlike the oven, we did not have a backup microwave. To make things worse, our counter space is limited and doesn’t have room for a counter microwave. Jaeger poked around and discovered that the trim around the microwave came off and he could pull the microwave out without an excessive amount of effort.
Given both the microwave and oven were no longer working, I contemplated just buying a new wall oven. However, wall ovens, at least fancy ones like we have, don’t appear to come in standard sizes. I also learned that the equivalent Thermador oven, now a “triple oven“, would cost around $10,000. I could switch to a different brand but I couldn’t find one that looked like it would fit the current space in our wall. There are companies that will take a wall oven and customize the wall niche so it fits the new oven. However, I couldn’t imagine that would end up particularly cheap either.
We decided to fix the immediate problem, no microwave, and continue to procrastinate on the oven. Then I learned that the space provided for the microwave is a bit small by today’s standards. None of the official built-in microwaves I found were the right size. Eventually, I discovered there was an equivalent LG microwave to our old one that, while technically a countertop model, had a trim kit option to convert it to a built-in. I didn’t love the buttons2. However, at this point it was obvious it was our only option.
We got the microwave oven and confirmed it fit. However, the old microwave had metal pieces screwed, and duck taped, on in order to make it fit the Thermador space. We’d need to transfer the metal to the new microwave before we could install it back into the oven system. I started taking pictures of how the metal fit together, so I’d be able to recreate it on the new microwave. However, after I finished taking pictures I decided that since we already had part of the oven system taken apart, I should at least evaluate the difficulty of dealing with the control board.
I found a website, circuitboardmedics.com that claimed to be able to rebuild boards for our oven model. However, their website said that if we had a low heat problem, we should send in the relay board also. I sighed, and found a video on extracting the relay board. This video was for a double oven but the process is essentially the same except all four anchor screws are in the single oven and I blessedly also only had one relay board to extract.
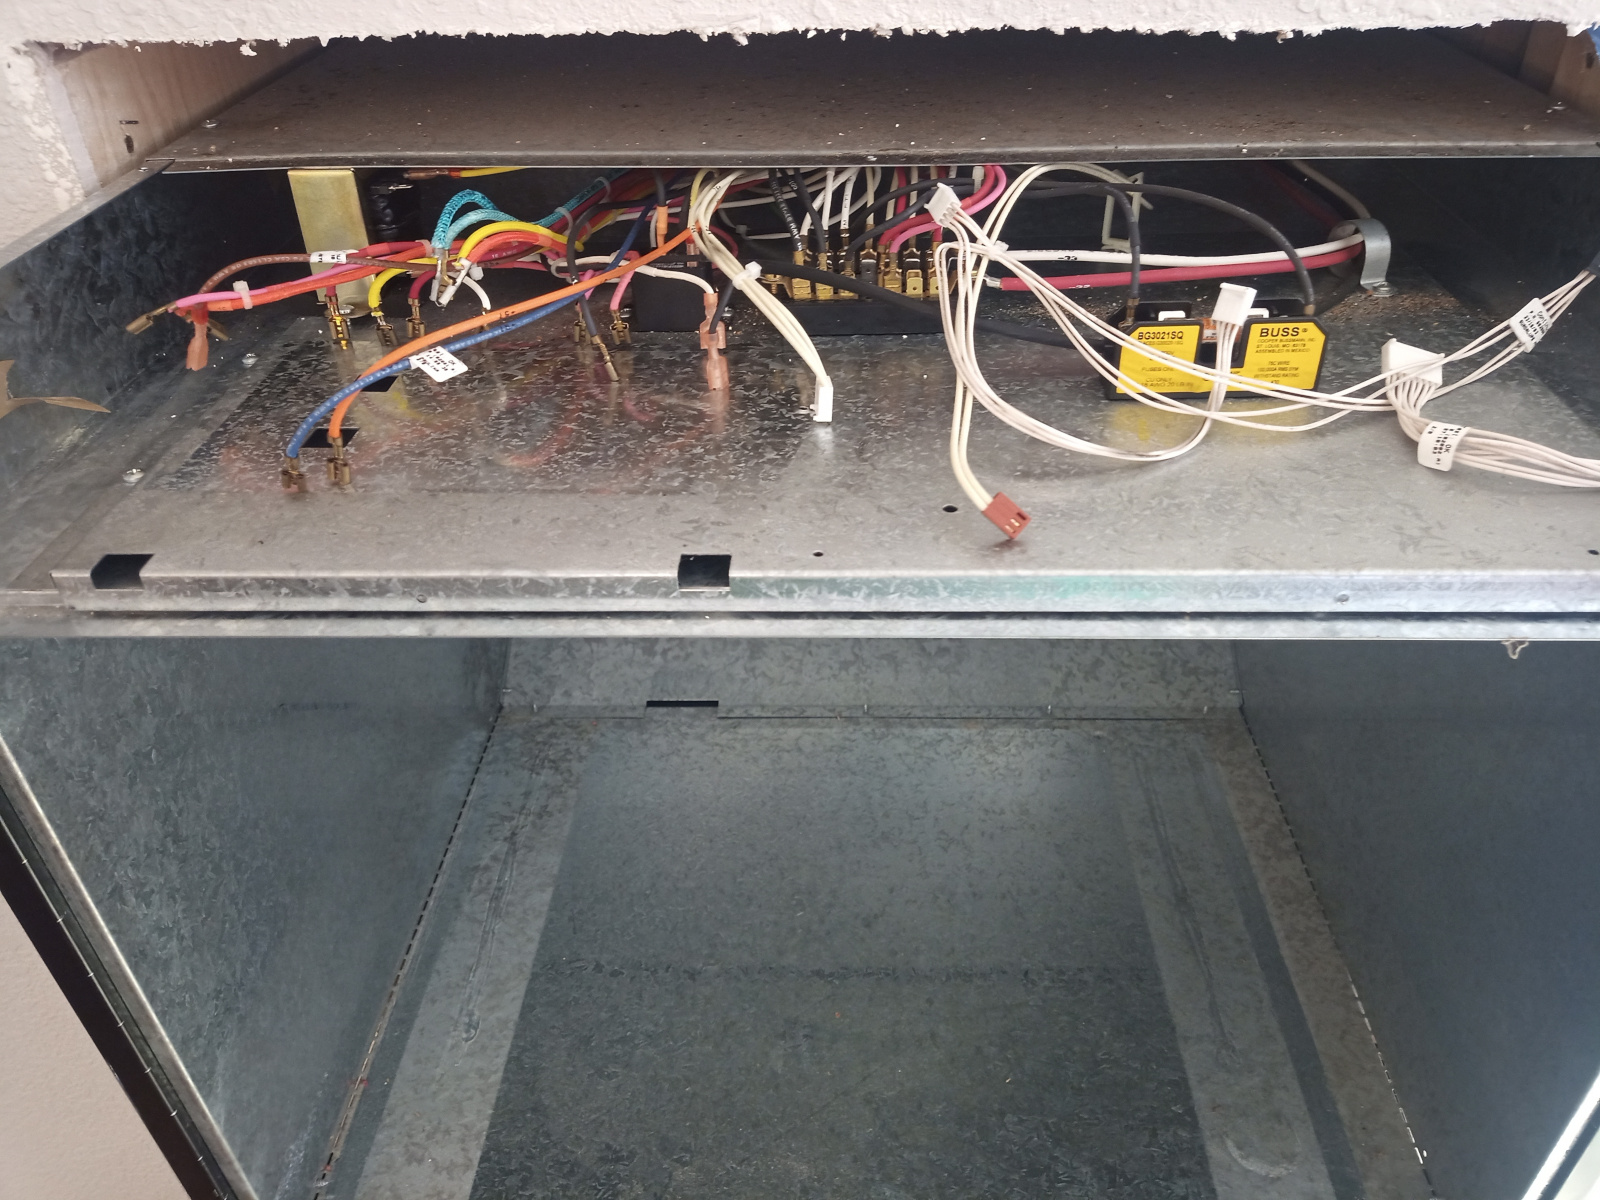
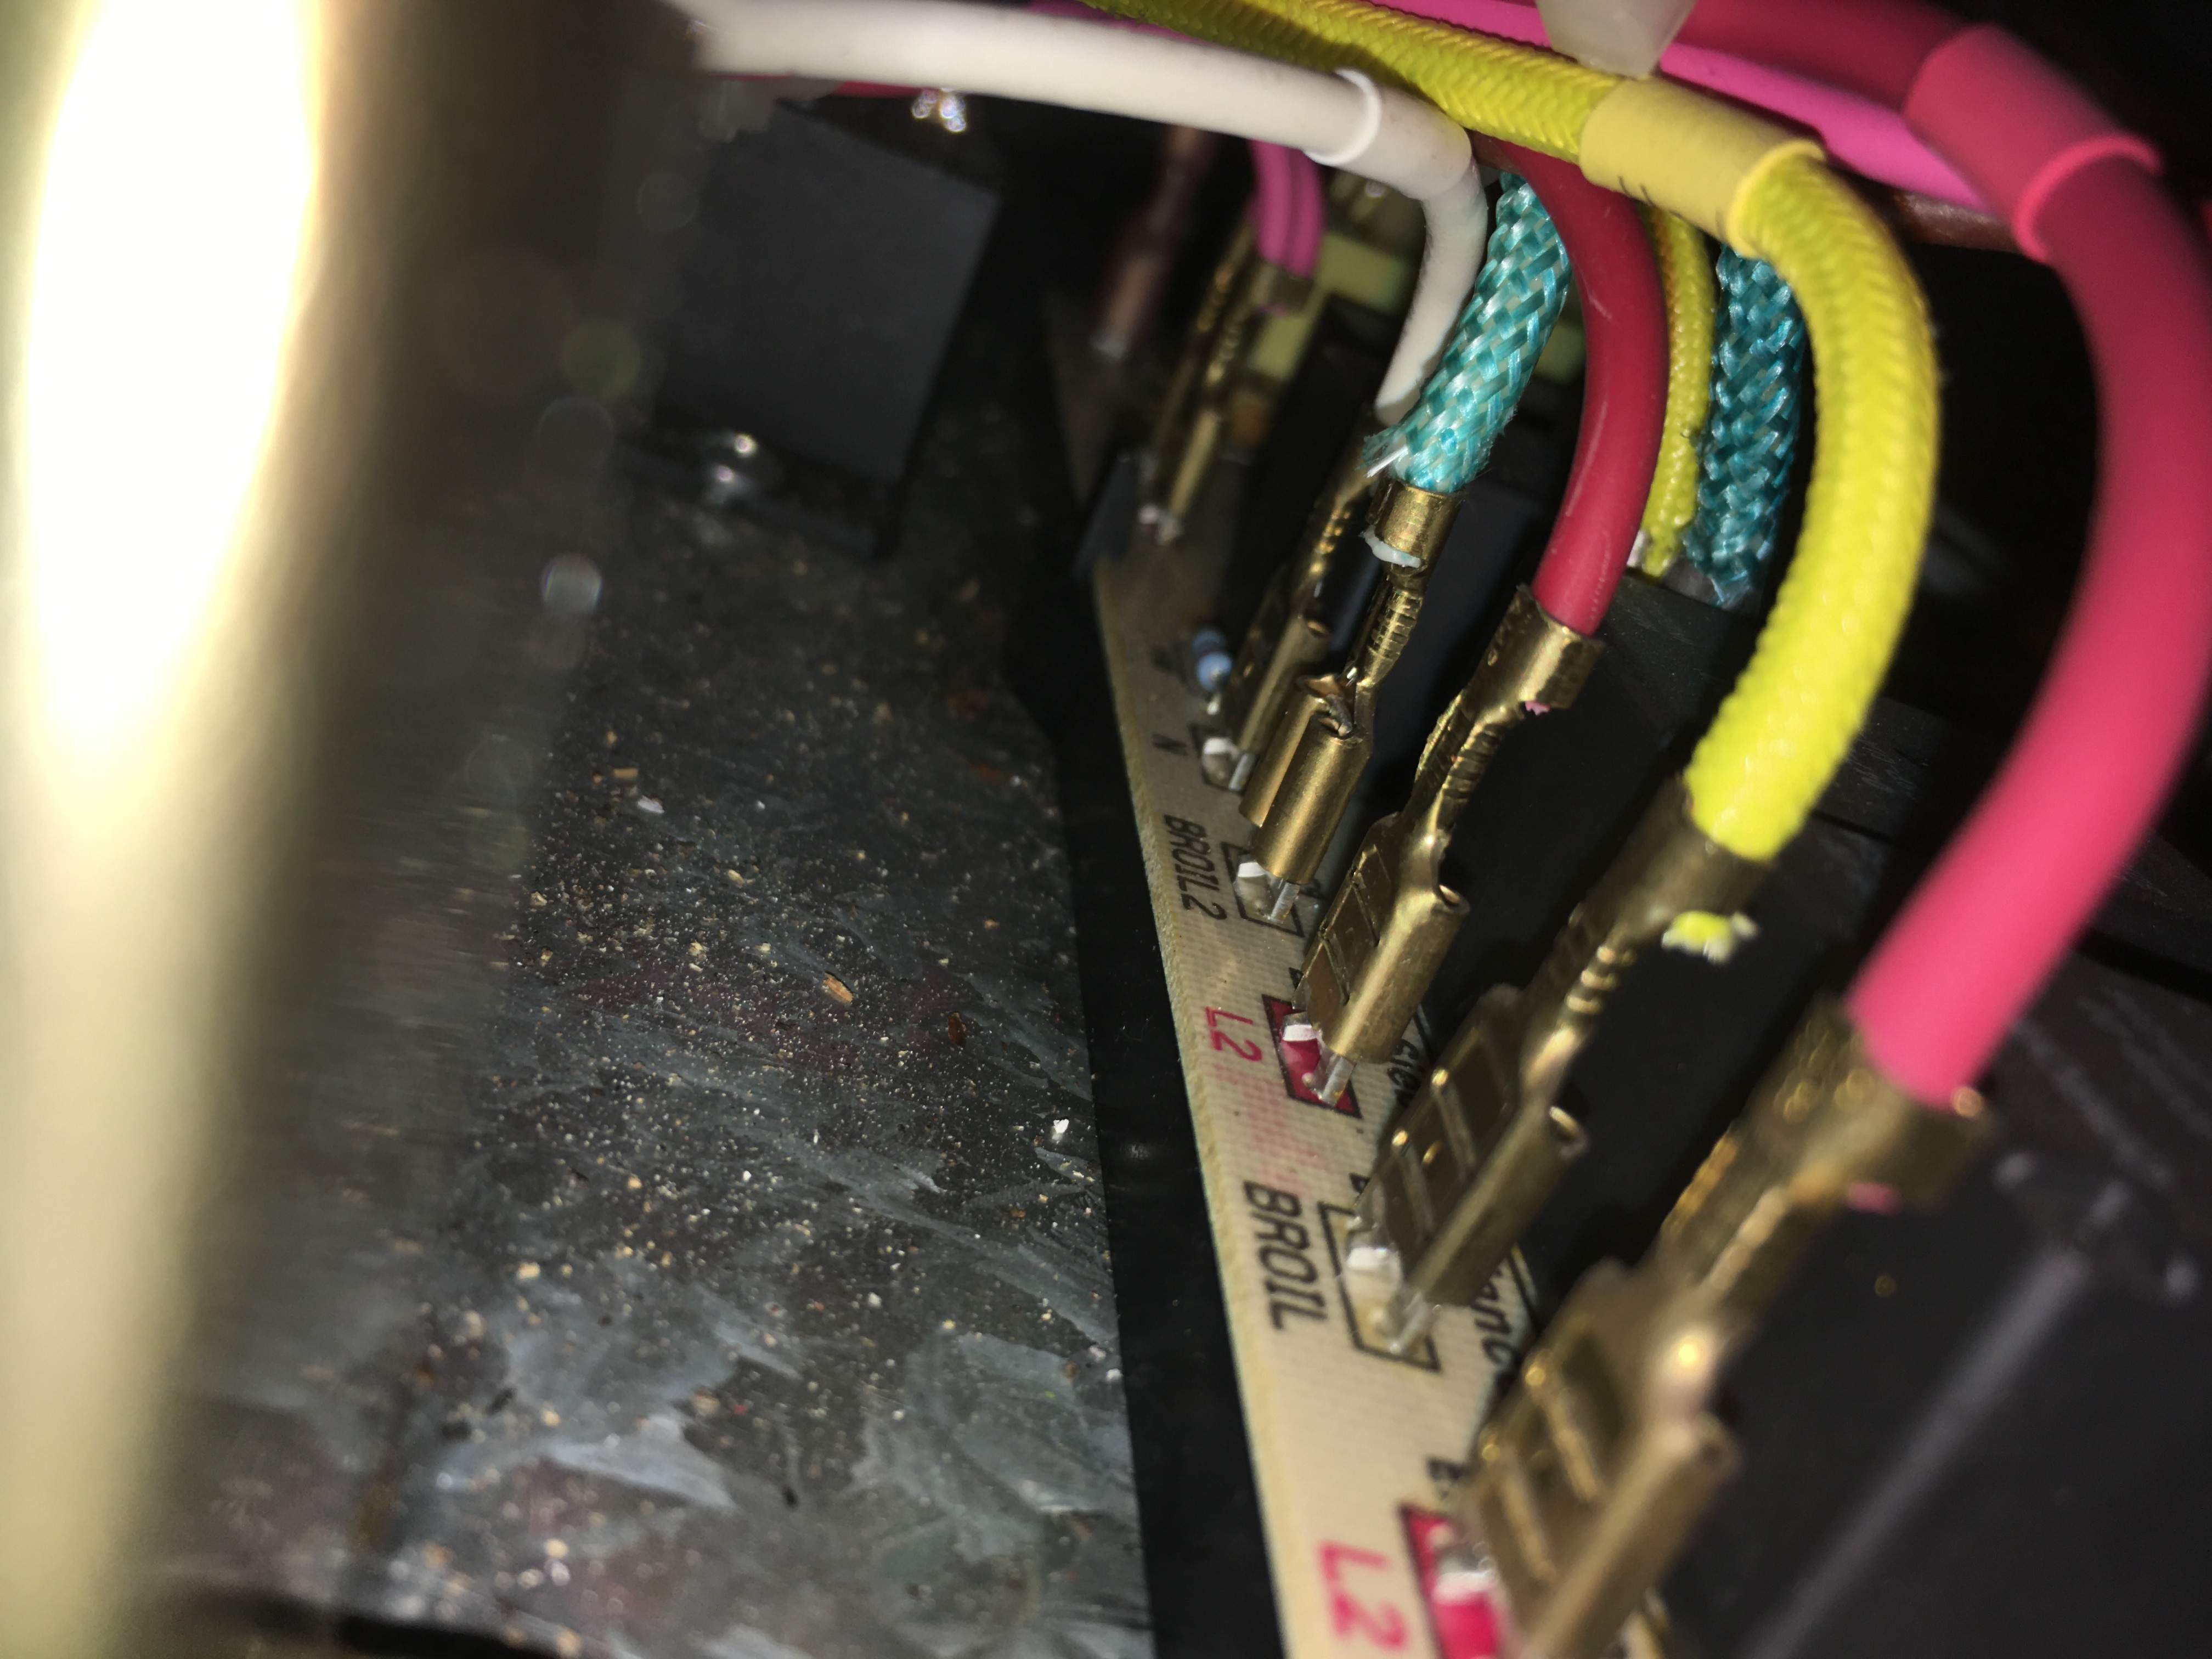 At first, I was hoping I could just take off the front panel and get everything from there. However, it quickly became apparently I was going to need to pull the entire oven system out about a foot in order to get to the top screws. For me, my essential tools were my camera phone, needle nosed pliers, and a step ladder. I turned off the two oven circuit breakers, took many pictures to document everything as thoroughly as possible, and started pulling all the wires out of the boards. It was quite a project and ended up taking longer than I expected. However, at length, I had both the control and relay boards disconnected from the oven.
As required, I prepaid for the service, hoping desperately it wasn’t a scam, and then mailed the company the oven boards. It arrived at their facility on September 26 and they shipped it off on September 27. It arrived back at our house on Saturday, October 1. While it was nice to have back, it also meant I needed to find time to try install the boards back into the oven.
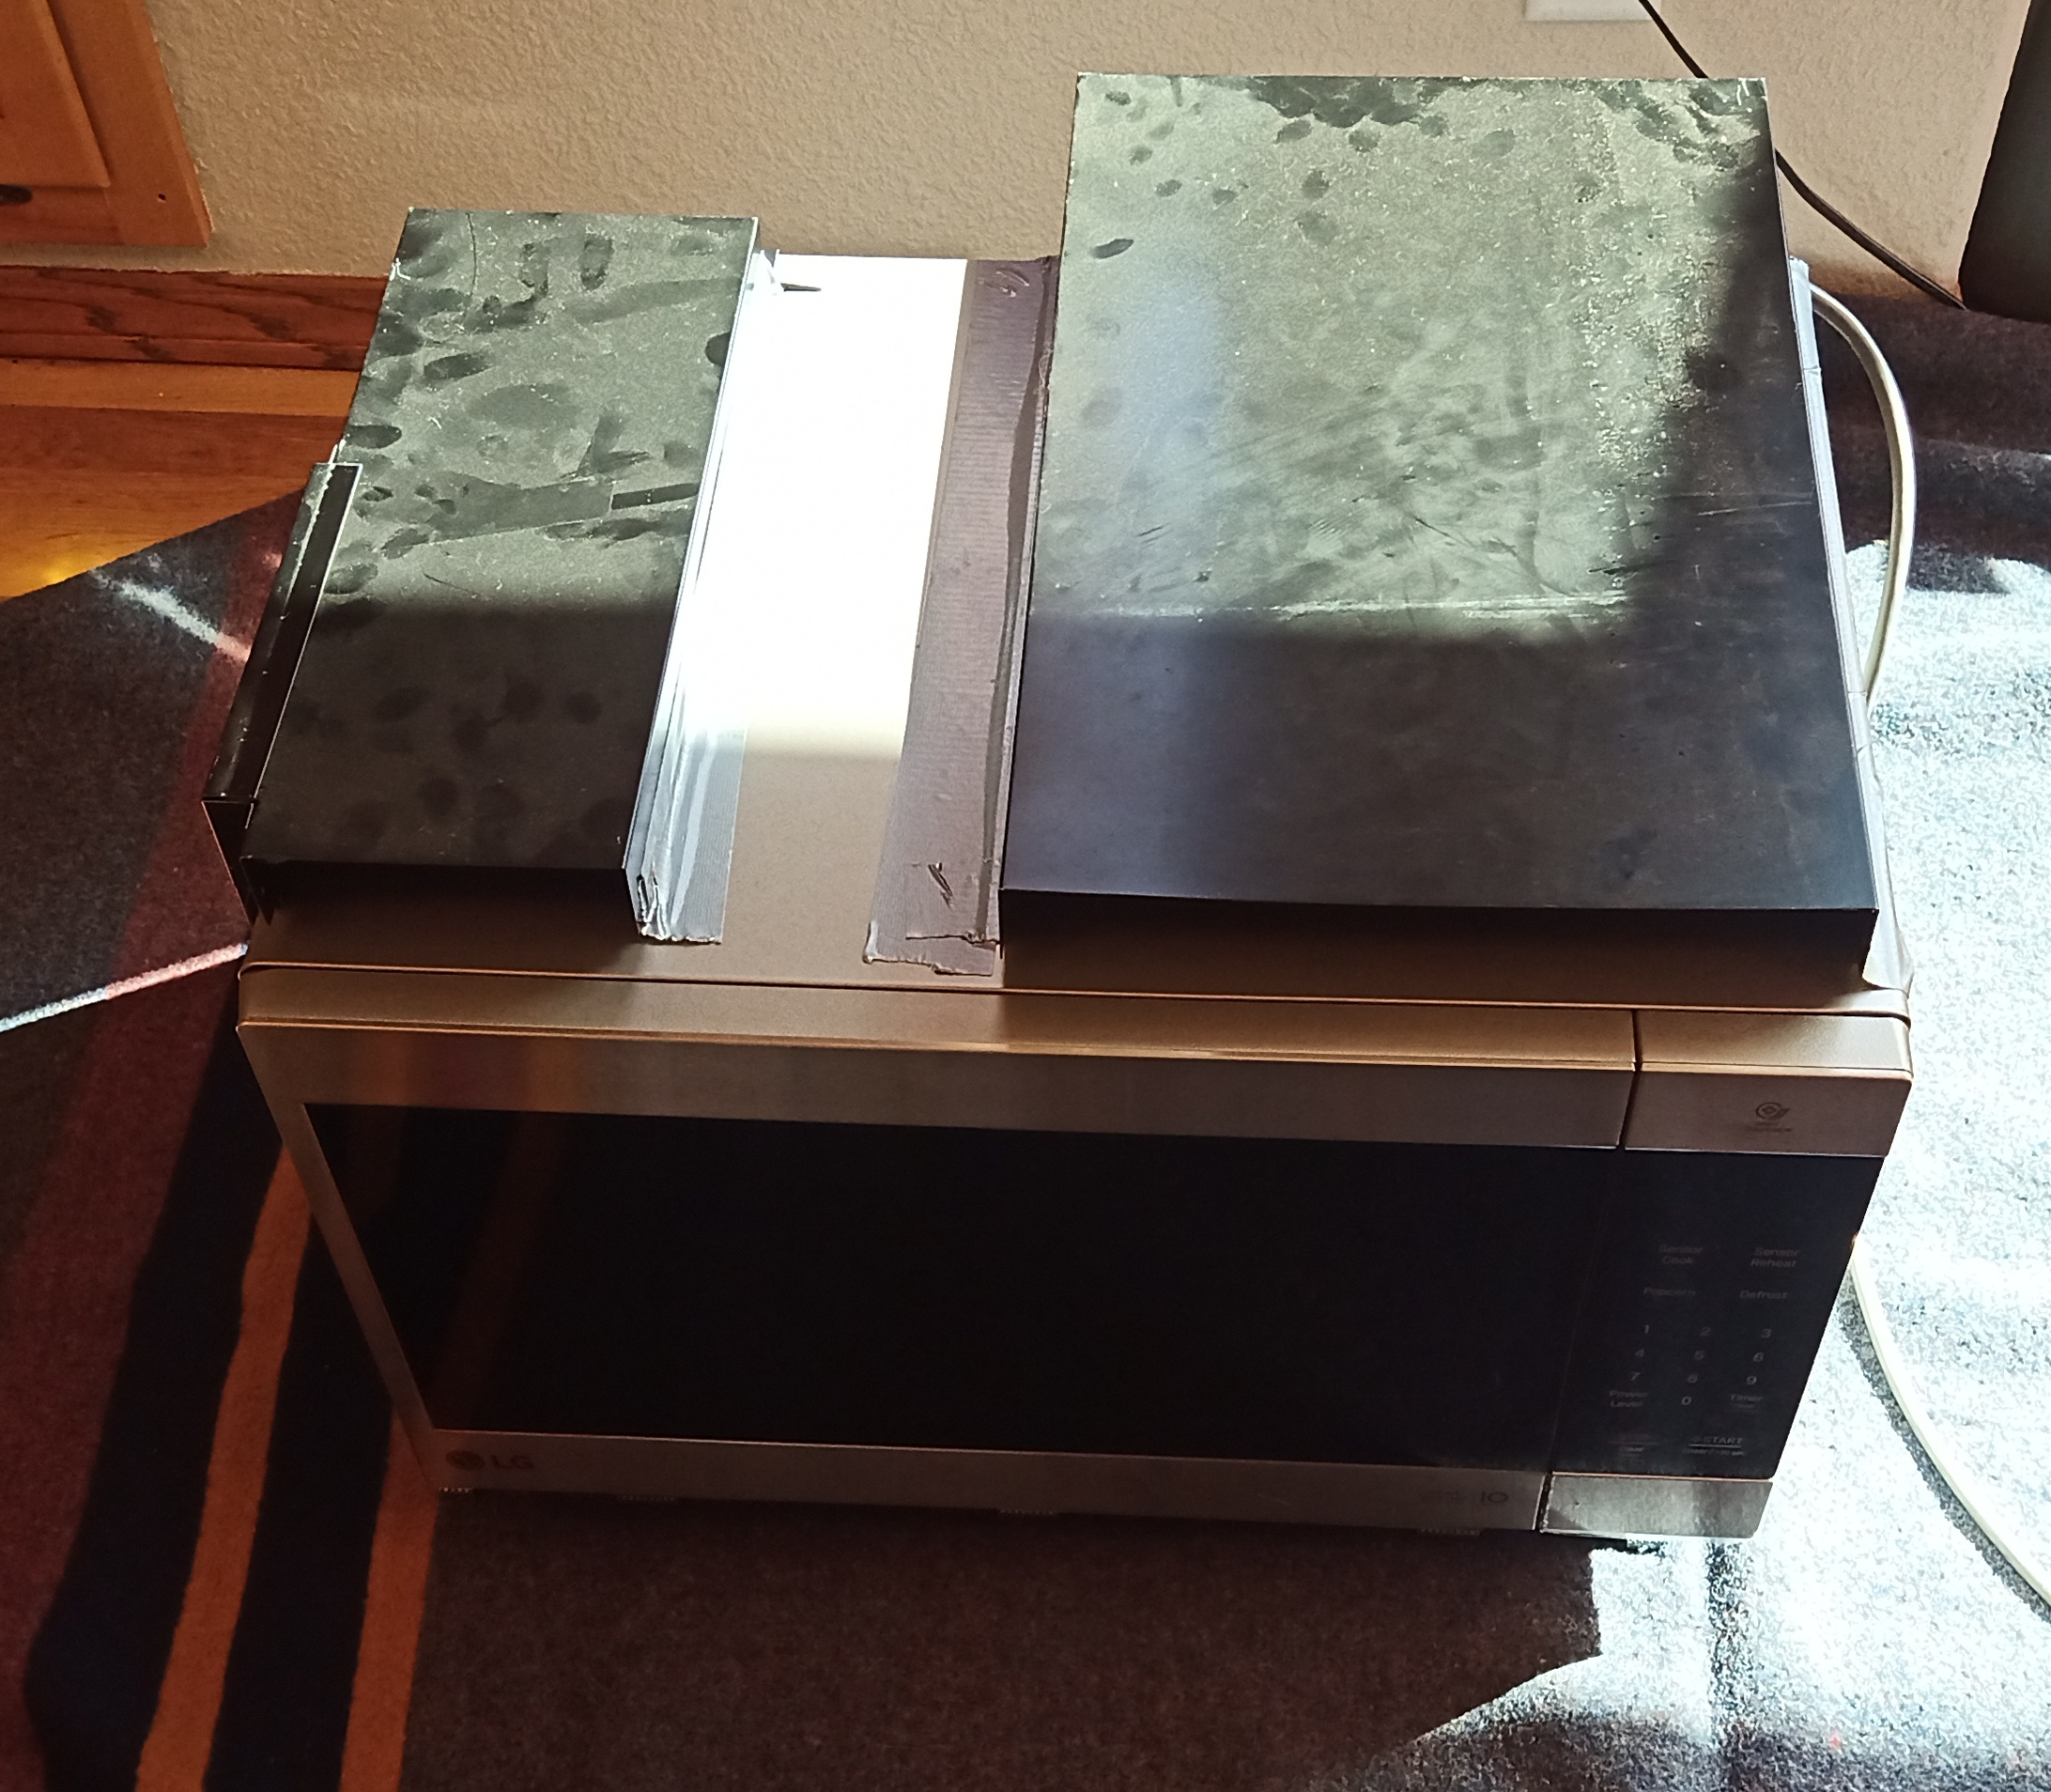
Here is how we used the microwave while waiting for the oven boards to come back.
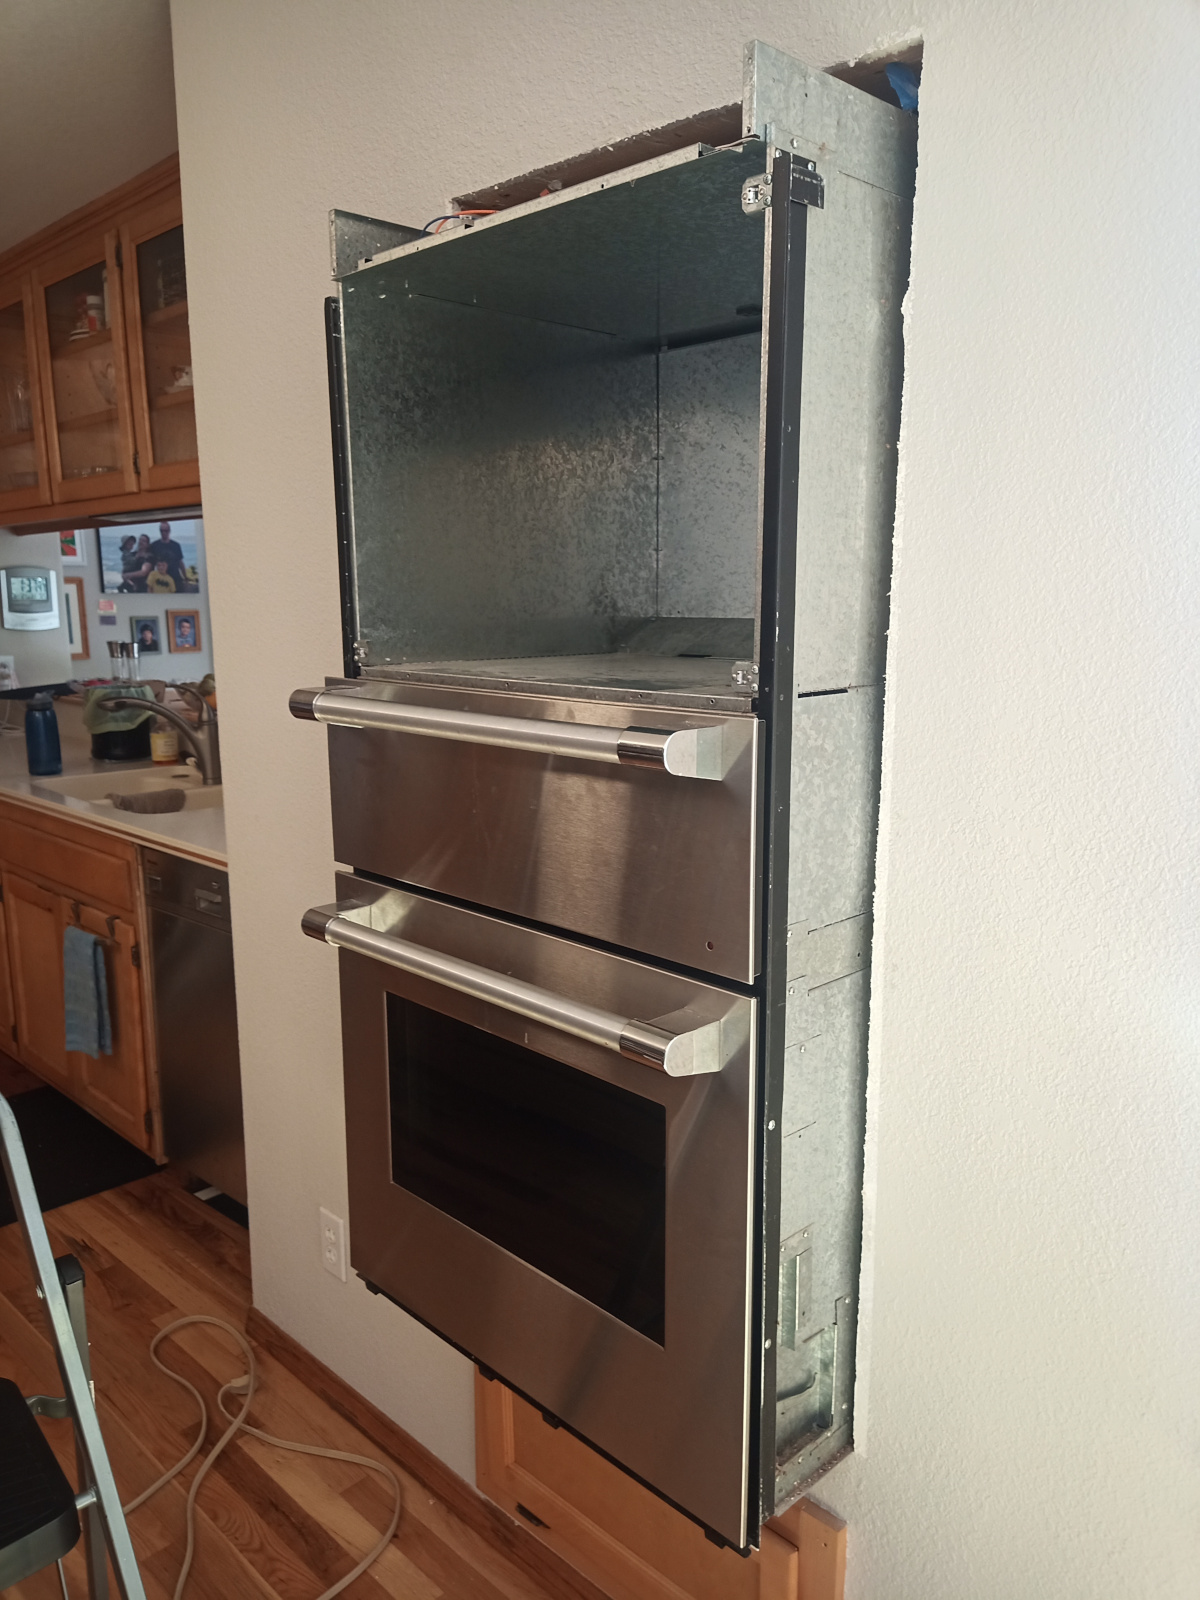
Pulling the oven away from the wall to access the top.
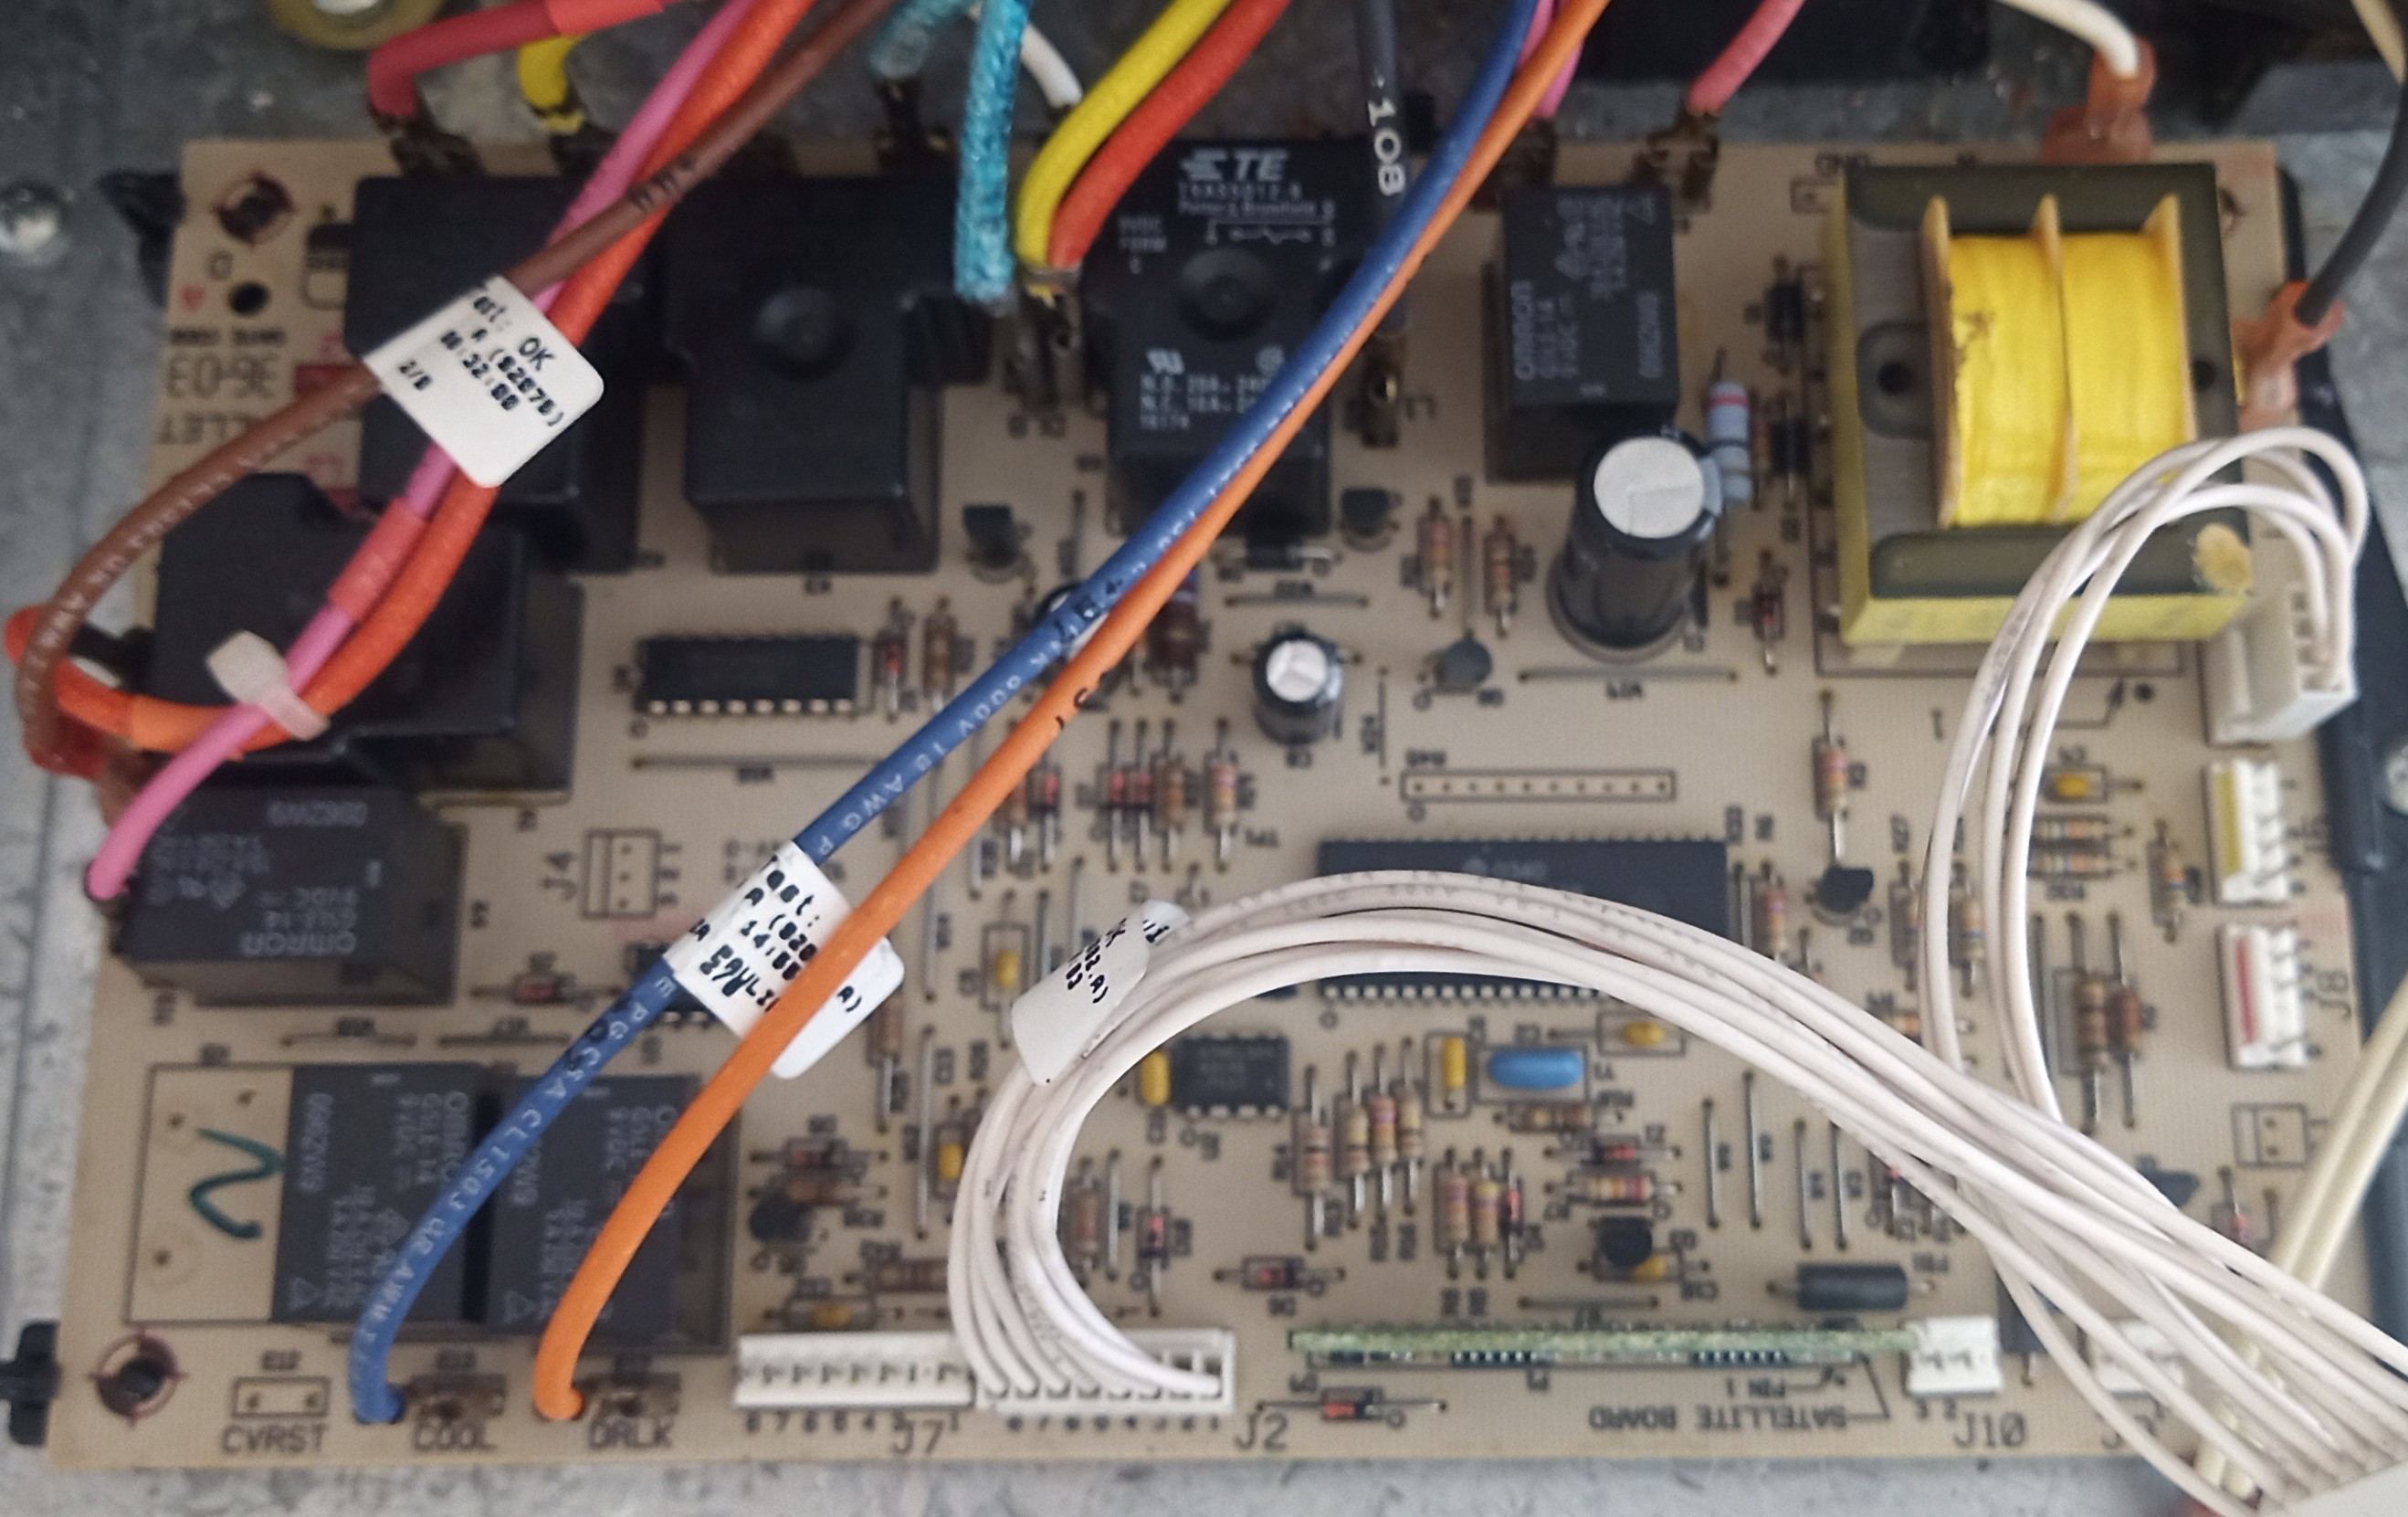
 Sunday afternoon, when I should have been cleaning, I decided to tackle the oven. It turns out that putting the wires back on is substantially easier than taking them off. It wasn’t nearly as painful as I expected. For the most part, I had taken enough pictures for me to recreate where the wires went. However, I wasn’t quite detailed enough in some of the early pictures so I also ended up looking at the oven circuit diagram to double check a few of the wire placements.
 I installed the relay board, then the control board, and finished by connecting up the control panel. Then I pushed the oven back into its hole, though I didn’t screw it back in. I pulled out the kitchen fire extinguisher, double checked it was rated for electrical fires, and then flipped the circuit breaker back on. Nothing exploded! The oven clock started to placidly blink. Definitely a good sign. I tested a couple of features that had been working previously, such as the timer and oven light and then, with some nervousness, set it to bake at 350 degrees. This oven usually takes around 10 minutes to preheat so I hovered and watched. Once it finished preheating I opened the door and it felt about right. Though, I suspected that this approach is as fraught as parents trying to gauge if a kid has a temperature by using the hand on forehead method.
 I screwed in the oven to the wall and then started putting the support metal pieces onto the new microwave. To my surprise and relief, it mostly fit and only needed duck tape in the same places the previous microwave had needed it. Once its metal appendages were attached, Jaeger helped slide the microwave back into the oven slot and we snapped the decorative trim around it. Everything now looked normal again.
While I was fairly certain the oven was heating up correctly, I wanted to confirm. I decided to try baking King Arthur Flour’s Chocolate Breakfast Muffin as I make it a fair amount and I know it’s a reliable recipe. Once the batter was made, I dropped it into the muffin cups and put it into the preheated oven. I got the muffins out to test at 22 minutes and thought it wasn’t quite done so put it in for another three. In retrospect, it probably was done at the 22 minute mark as they ended up a tad on the dry side. However, the recipe did verify the oven was baking as expected!
The new microwave cost around $240. The control and relay board repair cost around $340. Not cheap but much better than what a complete replacement would cost. I’m really happy to have my wall oven working again.

A working oven and microwave!
- Though, one thing I absolutely hate about the range is, in order to preheat faster, it turns the broiler on. This messes up how I do sweet rolls which involves making them the night before, putting them in the fridge overnight, and then in the morning putting them in a cold oven which then gradually heats up to its normal baking temperature. The first time I made sweet rolls after switching ovens I ended up with blackened bread. ↩
- Among other things, it only has a +30 second button and no quick 1 or 2 minute buttons. ↩
Gem, You are amazing!! I’m so glad the website wasn’t a scam and did very fast, excellent work.
Congratulations is getting your wall oven and microwave repaired and working very well!!!
Thank you! I was especially excited because I ended up using both ovens yesterday. One for baking bread at 450F and another baking potatoes at 400F. Such luxury :)