Category Archives: Food

Hot Chocolate Tasting

My favorite winter activity is to sit in front of the fire with a book and a cup of hot chocolate. Which hot chocolate I choose depends a bit on my mood. However, several weeks ago I decided I should taste all the hot chocolate I had in the house and take notes about which I liked best. Calvin enthusiastically signed up to this idea and Julian seemed uncertain but intrigued. Jaeger clearly couldn’t figure out the big fuss but started the tasting with us.

I printed up little cards where everyone could take notes about how many stars they gave each hot chocolate and any comments. We ended up with eight different kinds of hot chocolate which, in retrospect, was too many. Each tasting was about 1/4 cup. Jaeger gave up after four but the rest of us persevered through the full eight.

Our results (out of 5 stars)1:

Hot Chocolate Kiesa Calvis Julian Average
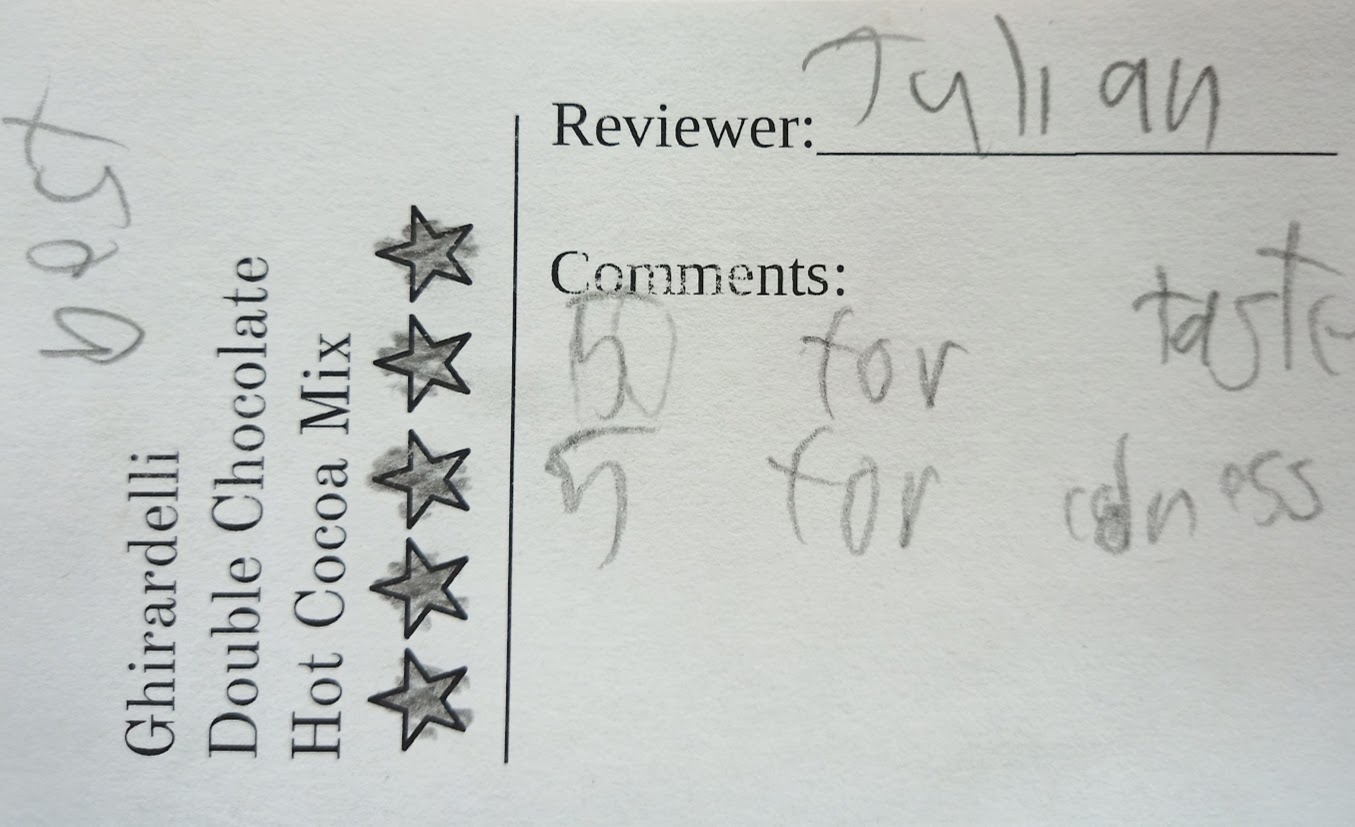
Ghirardelli Double Chocolate Hot Cocoa Mix 4.00 4.75 5.00 4.58
Hershey’s Hot Chocolate Recipe 4.50 4.50 2.50 3.83
Nestle Chocolatey Memories Hot Cocoa Mix 4.00 3.25 3.50 3.48
Abuelta Authentic Mexican Chocolate Drink Mix 4.00 3.75 2.00 3.25
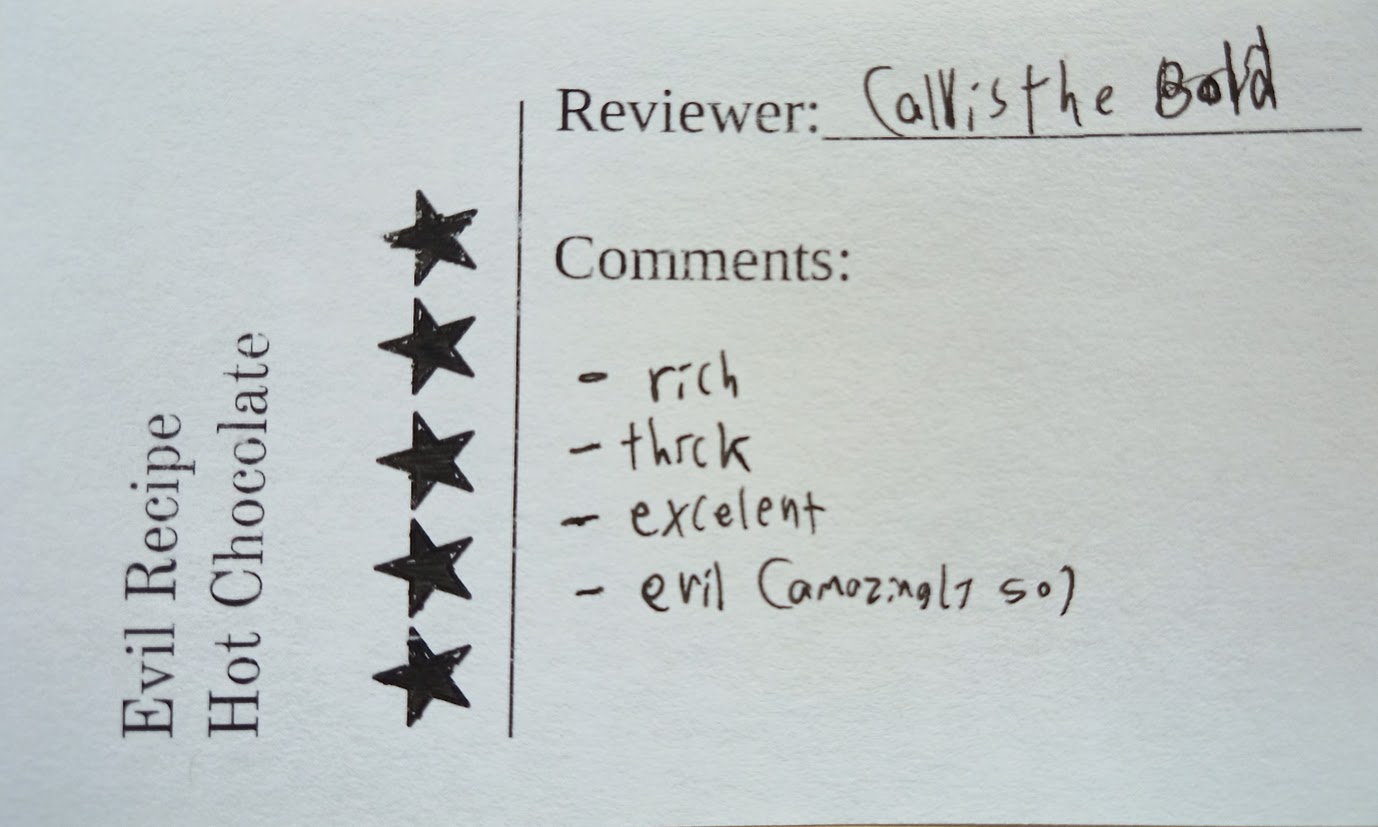
Evil Recipe Hot Chocolate 4.50 5.00 0.00 3.17
Starbucks Hot Cocoa Double Chocolate 4.50 4.00 0.00 2.83
LaMonarca Bakery Chocolate Mexicano 3.50 2.50 1.50 2.50
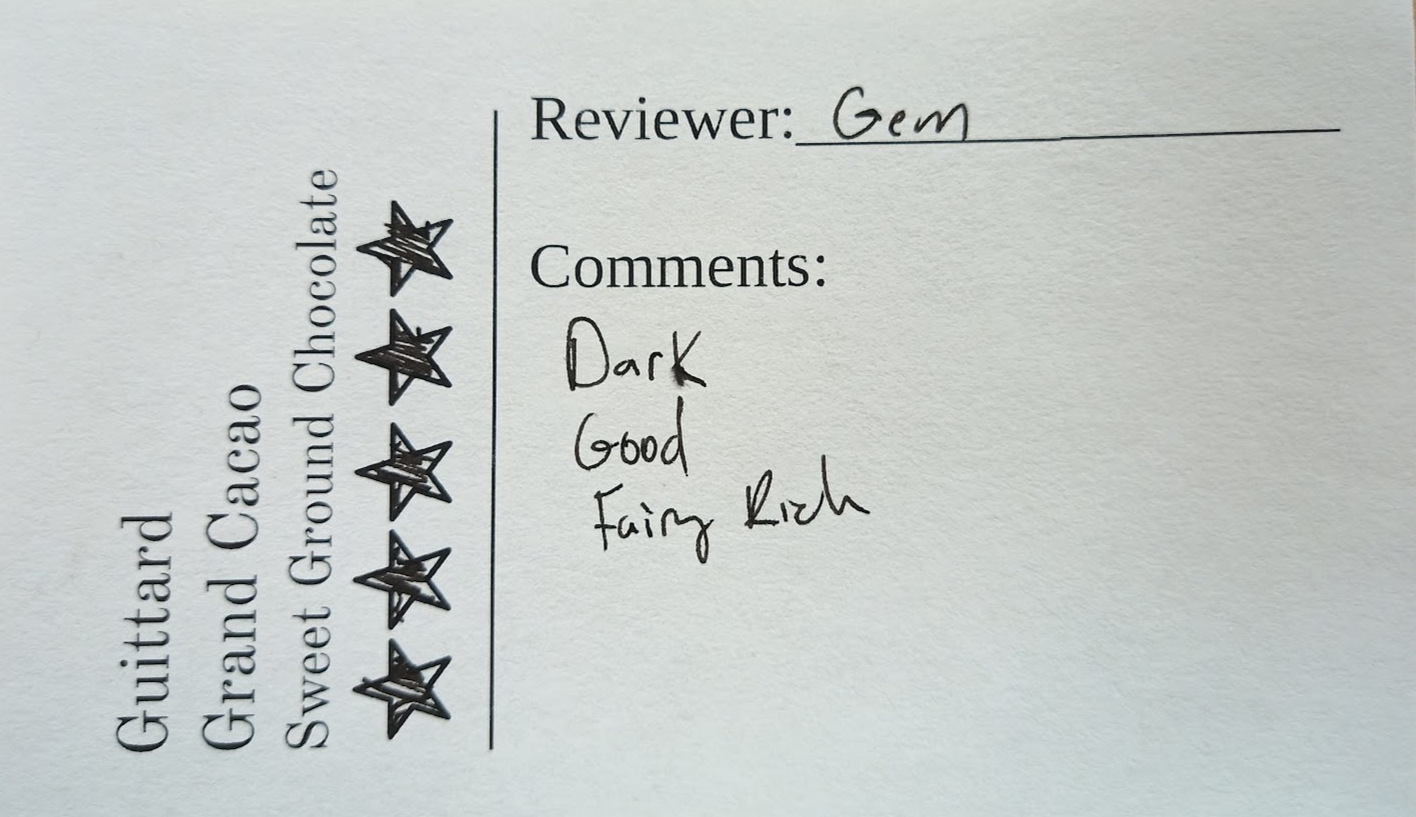
Guittard Grand Cacao Sweet Ground Chocolate 5.00 3.50 -1.00 2.50

Ghirardelli Double Chocolate Hot Cocoa Mix
This is a very safe hot chocolate that everyone enjoyed. Up until our tasting, I thought it was my favorite. However, I usually drink it with a cinnamon stick and for the tasting I had it plain. When it’s completely plain I found it a little boring.

Hershey’s Recipe Hot Chocolate
This is a recipe in the 1984 Hershey’s Chocolate Treasury cookbook. It’s made with 1 oz of unsweetened chocolate, 2 tbs hot water, 1/4 cup sugar, dash of salt, 2 cups warm milk, and 1/4 tsp vanilla.

Nestle Chocolatey Memories Hot Cocoa Mix
These are individual hot chocolate packets that I got for camping several years ago. I was a bit surprised how well it ended up rated. It’s probably the cheapest hot chocolate on the list.

Abuelta Authentic Mexican Chocolate Drink Mix
This is the hot chocolate I usually serve for breakfast. Many years ago my high school Spanish teacher brought in hot chocolate as a special treat. The teacher was bemused by how much our class loved it. This hot chocolate kind of reminds me of that, though it’s not quite as good as my memories. (I’m pretty sure my teacher made hers from scratch.)

Evil Recipe Hot Chocolate
This is Calvin’s favorite hot chocolate. To make it, you take a liquid measuring cup and pour in chocolate chips to the 1/4-1/3 cup marker. Then, add milk to the 1 cup line. Microwave for about 1:30 and then stir till it’s all mixed together. It’s extremely rich.

Starbucks Hot Cocoa Double Chocolate
This one also comes in individual packets. However, it doesn’t work as well for camping as it really requires milk to make it taste good. That said, with milk, it’s a decent, fairly dark, hot chocolate.

La Monarca Bakery Chocolate Mexicano
I bought this hot chocolate when I was looking for an upscale version of the Abuelta brand. We all agreed the flavor was great. However, it was very gritty. My hypothesis is it has a great flavor because of the cinnamon, which perhaps is not as finely ground as we prefer.

Guittard Grand Cacao Sweet Ground Chocolate
When by itself, this was my favorite hot chocolate. However, Julian’s -1 rating pulled this all the way down to the bottom of our list. It looks like I can safely hoard it for myself without anyone else complaining.


Sample comment cards:
Evil Recipe Hot Chocolate. 5 stars filled in. Reviewer: Calvis the Bold Comments: -rich -thick-excellent -evil (amazingly so)

Guirardelli Double Chocolate Hot Cocoa Mix. 5 stars filled in. Reviewer: Julian Comments: 5 for taste 5 for coldness. Written on the left side in pencil it says 'best'.

Guittard Grand Cacao Sweet Ground Chocolate. 5 stars filled in. Reviewer: Gem Comments: Dark Good Fairly Rich

  1. Jaeger left comments but no ratings.

Persimmon Trees

Our Seattle house has four Fuyu-style persimmon trees. This provides more fruit than five people can eat in a reasonable amount of time. I assume there are many ways one can preserve persimmons. However, it was December and I didn’t have a lot of time to deal with them. I found a blog post implying that one could freeze persimmons whole without first having to extensively prepare them. So, that’s what I did. I set them out on cookie sheets, froze the persimmons till they were hard, then transferred them to gallon zip lock bags for long-term freezing. Fortunately, we have an extra freezer in our garage.

This worked much better than I expected. It turns out that if you run frozen persimmons under warm water, their skins are really easy to peel off1. Once thawed, the persimmon is very pulpy, more like a ripe Hachiya persimmon. Now to figure out what to do with them . . .

Back in December, I made Jaeger’s mom’s Persimmon Pudding recipe which was good. Today, I decided to try to make persimmon muffins. I looked up persimmons in my trusty baking books but couldn’t find any appropriate recipes. Of course, I could have just searched the internet for persimmon muffin recipes, there are quite a few. However, I decided to adapt a King Arthur Flour recipe instead. I reasoned that persimmon pulp is somewhat similar to ripe mashed banana so I might be able to convert a banana recipe for persimmons. It seems to have worked fairly well. Here’s the recipe.

  1. Kind of the reverse of blanching tomatoes to remove their skins.

Twenty-Eight Meals

Starting in January I will go from 20 hrs/week to 32 hrs/week. I’ve been 20 hrs a week ever since Calvin has been born and I’m definitely ready to increase. However, the work reason I’m increasing is we’ll be doing a major migration of the integrated library system (catalog) next fall and I need to work more to get ready for it. My tentative idea is to get up around 6 each day, work until it’s time to get Calvin up. Then I’ll take a break for breakfast, drop Calvin off at school, and then work some more until it’s time to pick Calvin up. In addition, I plan to stop doing regular work on Sunday and instead switch back to a traditional Monday-Friday schedule1.

My biggest concern at the moment is where I’m going to fit household tasks in. Right now, Monday is my “day off” and I use it to pay bills, balance the checkbook, run household errands, etc. I’ll be switching that to Sunday. Right now, after I finish work on Sundays I usually sit down and prepare my menu for the week and then go grocery shopping. This takes a ridiculous amount of time. I can easily spend an hour meal planning and then a couple hours shopping. In preparation for my hours increasing, I decided I should see if I could streamline meal planning and shopping.

This weekend I came up with 28 meals that I hope can be repeated without wearing them out too fast. You can see it here. I also wrote down every single ingredient needed for the meal and then sorted the ingredients by location in the store2. This way, when I’m making my grocery list, I can see what ingredients I need to buy for the week and put them on my list in the correct order. Since I grocery shop on Sunday, I have each week go from Monday-Sunday so I always have ingredients for the current days meal on hand3.

I’m not sure if this menu plan will work out or not. Nor, am I sure what this will do to our grocery bill. However, hopefully my scheme works out well.

  1. This will actually be the first time in my professional career where I don’t work Sundays. I started working most Sundays as a reference librarian to compensate for never working Saturdays. Others viewed Sundays as less popular to work because you only work 4 hrs so you had to make up the additional 4 hrs some other way. As a result, the other librarians were very amenable to me never working Saturdays since I took the dreaded Sunday rotation off everyone else’s schedule. When I transferred to IT, I was use to working Sundays and since we’re closed Sunday mornings, it was a great time to do server maintenance
  2. The Indian meals use a huge number of spices so ingredients list looks intimidating but most of them are relatively fast to put together. Since Jaeger likes Indian food so much I have a special spice carousel dedicated to Indian spices.
  3. Worst case, this allows me to wait to grocery shop till Calvin is in bed. I used home delivery for a while but had trouble getting my orders in. I’m not convinced I want to go back to home delivery, sometimes I had trouble getting them to delivery exactly what I wanted, but this meal plan should make it easier either way.

Masala Crêpe

On Jaeger’s first trip to India he encountered Dosas and became infatuated. Upon returning home he described them to me and I attempted to make some. Unfortunately, having never had dosas myself, I had only the vaguest idea of what I was doing. However, I found a recipe which made a huge amount of batter. This was fortunate as I wasted more than 1/2 the batter before I realized it was absolutely essential to use my cast iron skillet, not my non-stick skillet. However, I still had some trouble as my cast iron skillet has sides and is smaller than the traditional skillet for dosas. In spite of all this, I think I got the general idea even if it needed a lot of refinement.

Eventually, Jaeger found an establishment in Denver that served Dosas and took Calvin and I out to try them. They were pretty good. Then, a bit later, a restaurant opened up in Boulder that makes dosas so my enthusiasm for doing it myself waned.

Last year, we moved from Longmont down to Gunbarrel. Unfortunately, the stove that came with the house was a glass-top electric stove. I have not been impressed. It probably took me the first 6 months just to learn how not to burn pancakes. More disturbing, using cast iron skillets is not recommended for glass-top stoves. Up in Longmont I prepared more than half the meals we ate in my cast iron skillet and have profoundly felt the lack of it since. The one redeeming value the glass-top stove has is it’s attached to a convection oven that I love.

I did try to make dosas, from a pre-made mix, a couple of months ago and it was a disaster. I blame having to use my non-stick skillet. So, today instead of dosas, I made Masala Crepes. For some reason I can make crepes perfectly fine in my non-stick skillet, I’m not sure why. Maybe the egg makes it stick less? In any case, I used Jaeger’s mom’s crepe recipe and substituted some of the wheat flour for chickpea flour. I should have put some fenugreek in it too but forgot. Then I filled the crepes with “Mrs. Joshi’s Potatoes with a Fresh Coconut-Lime Sauce” from 660 Curries. It’s obviously not authentic but does provide the general feel of a Masala Dosa.

Calvin’s Birthday Party

Last Sunday we had a whole bunch of Calvin’s preschool classmates over to celebrate his birthday. Jaeger’s parents were also able to come for the party.

Calvin’s cake was really a brownie that I poured into a cookie sheet with sides. I used the “Fudge Brownie” recipe from my Better Homes and Gardens Cookbook1. For the frosting, I used King Arthur Flour’s Fudge Frosting. I think the yogurt gives the frosting a little zing. Previously, I had made a double batch of frosting which ended up being way too much. This time I used a single batch. Jaeger thought the double batch kept the brownie moister, which is probably did, but I didn’t want to give preschool kids that much sugar.

Calvin adores sprinkles so I bought special primary color sprinkles for him to put on the brownie.

Calvin adds sprinkles to his brownie

After the sprinkles, I arranged the Lego candies which I had previously made.

Happy Birthday Calvin! using Lego Candies

Since Calvin’s birthday party ended up falling on Easter, I decided it would be fun to do a Lego-themed Easter egg hunt. I bought two sets of Legos: a “boy” set and a “girl” set. I also borrowed some Legos from Calvin. The pieces that were too big to fit in the Easter eggs, like the horse, went into Calvin’s Lego set so I think it ended up about even. I stuffed approximately 160 Easter Eggs. About an hour before the party Jaeger and I attempted to hide them. It takes a long time to find easy, but not too easy, hiding places for 160 eggs.

As the children were arriving for the party I had them gather around the table and decorate their Easter egg bags. I had found white lunch sacks at Target and then had a variety of stickers, crayons, and markers on the table to decorate with. The children seemed amused by this but it didn’t take very long to get all the bags decorated. Once it seemed a majority of the children had arrived, we started the Easter egg hunt.

This was the first Easter egg hunt that I had ever organized. I went looking all over the internet for ideas. The internet suggested I should have at least 12 eggs per child. However, I was worried that some kids would find a lot more than others. Finally, I hit on the idea of telling the kids they could have one egg of every color. I had enough eggs that there were about 8-12 different colors, depending on whether or not you considered two shades of a color to be the same color. All the children were very good at only picking up one egg per color. After it seemed that most of the children had at least one of every color, we told them they could go and gather the rest of the eggs.

Jaeger and I worked hard to find places to hide the eggs. It’s not easy in a yard that’s still recovering from winter. However, I think we managed to provide both easy and harder options. Some of the mothers commented that it was refreshing to go to an Easter egg hunt where you had to hunt for the Easter eggs versus them just laying randomly out on the ground. I hadn’t been able to find an estimate for how long an Easter egg hunt should take. The kids found most of our eggs within a half hour and seemed to lose interest about the same time.

Jaeger’s mom and I had looked in some books for some other activities to do. One of the ideas we had run across was balloon volleyball. Originally, we were planning to do it in our family room but the day was gorgeous so we decided to try to do it outside instead. I ran a yellow streamer across two chairs and then some of the parents blew up balloons to use as volleyballs. Unfortunately, the balloons popped as soon as they touched anything, including the grass. I pulled Calvin’s blue beach ball out instead but it seemed too little too late. Most of the kids weren’t interested in it.

Having given up on the volleyball game, we went inside to eat cake and ice cream. Afterwards, Calvin unwrapped his presents within a mob of his classmates. Having that many kids in the house towards the end of the party made me really thankful the weather allowed us to do the Easter egg hunt outdoors. It would have been a disaster indoors. Jaeger counted and we ended up with 14 adults and 13 children, including our family. That was a lot of people but I think it all turned out pretty well. I was really glad that Jaeger’s mom was around to help because I think we would have gone crazy trying to do it by ourselves.

  1. Note: if you search inside the book on Amazon for “fudge brownie” you’ll get the 2002 recipe which is different than my 1996 version of the recipe.

Making Lego Candy

Calvin is turning four this March. It seems both an eternity and an instant since he was born. When I asked Calvin what kind of birthday party he wanted, he said that he wanted a Lego party. Several years ago I had stumbled across a blog which had detailed instructions on how to make a Lego mold. Calvin’s birthday party seemed like an excellent excuse to try it out for myself.

My first hurdle was figuring out what type of silicone to use. Crafty Girl said she used Smooth-Sil 940 because she found some locally but liked the idea of Copy Flex better because it didn’t require as much math. Math doesn’t scare me but I couldn’t find any Smooth-Sil 940 in my area, or I was looking in the wrong places, and Copy Flex seemed easier to order in small batches.

I wanted to use the Legos to spell out “Happy Birthday Calvin” on his cake. I counted up the pieces and, using two 10×10 base plates, laid out the Legos I’d need. Then I did the math and discovered that using two base plates would require at least 4 lbs of silicone. Let me tell you, silicone is not cheap. 4 lbs was completely out of the question. After some changes, I decided I could get all the pieces I wanted from one base plate if I filled it up twice. I ended up with 40 2×4 pieces and 10 2×2 pieces and a couple spares to fill out the small amount of empty space left. This still required 2 lbs of silicone though.

I hunted around on Amazon and ebay and found some pre-made Lego-like mold options. However, the comments for all the molds I could find invariably said they weren’t standard Lego brick size. This was a problem because as it was, my Lego letters were barely going to fit on the cake. I went back to the Copy Flex website and asked myself if it was really worth the $50 plus $12.93 for shipping. If I had found the perfect Lego mold and saw the price tag was $62.93, I would never have bought it. However, somehow I managed to convince myself that this was a good investment because it was educational. We’d get to see chemistry at work! I ordered the silicone and waited with baited breath for it to arrive.

We had a couple of false starts. I had made the Lego base but Jaeger, correctly, suggested that washing the Legos would be a good idea. So, we ran the Legos with the base plate through on the top rack of the dishwasher with heated dry turned off (this is how we routinely wash Legos/Duplos ordered on eBay). The next day we got ready to pour only to notice that the Legos had collected water inside and so weren’t truly dry. *sigh* We took all the Legos apart and laid them out to dry on cooling racks. Finally, everything was ready.

Copy Flex comes in two containers: a catalyst and a base. The Copy Flex instructions suggested that refrigerating the two liquids would help slow down the reaction and provide more time to get the mold right. Other than being a little larger, I had constructed the positive Lego mold similar to how Crafty Girl had. I had tested it out with water and noticed the water leaked out so I worried that the silicone would also. To prevent an unexpected mess, I put the Lego mold on a cookie sheet. Then I took the two parts of Copy Flex out of the fridge and carefully stirred them together, trying to minimize the bubbles. As instructed, I poured the liquid from a height of about 12″ and let it spread naturally across the Legos. 2 lbs was exactly the right amount, it was perfect. I thumped it on the counter a couple of times because it seems like there were still bubbles in it. I wasn’t sure if thumping was helpful but I didn’t end up with any problematic bubbles.

Copy Flex cures within 4 hours but it was evening so this morning I woke up to take the Legos off. The silicone had leaked in a couple of small places but overall it wasn’t too bad. Interestingly, it seemed to be the places where I had made the border with Legos larger than the standard 2x4s. As Crafty Girl had promised, they peeled right off. I washed the mold with soap and water because Amazon reviews of the pre-made molds had mentioned that the dishwasher could leave a residue that would end up on the candy. The silicone is safe up to 400 degrees F so I stuck it in the oven for a couple of minutes to dry.

This afternoon, Calvin and I tried making our first Legos candies. I used Wilton Candy Melts and had bought several different colors. Walmart carries Candy Melts in their “wedding” aisle. Unfortunately, the candy melts are more pastel colored. I had tried adding gel fooding coloring to intensify the the colors but I didn’t have any oil-based coloring easily available so the melted candy kept seizing. Jaeger assured me it would still be ok and I’m trying to pretend the pastels are on purpose, maybe they’re the Friends Legos.

In any case, I melted the candy melts over a double boiler. You can microwave them but I felt the double boiler gave me more control and made sure they stayed melted. I used a small spatula to carefully fill each Lego slot with the melted candy. Wilton says the candy should be pudding-texture, because if you get it too hot, the candy is ruined. However, my later Lego bricks were made with a little more liquid candy and they turned out better. I would fill four 2×4 bricks and one 2×2 brick and then tap the mold against the counter, hopefully to get the air bubbles out. I wasn’t sure how fast the candy would set. I repeated the process until the entire mold was filled. Conveniently my mold holds exactly one bag of melted candy melts.

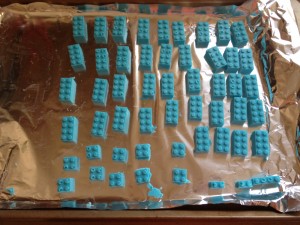
Here's how the mold looked right after I finished filling it.  You can see the small spatula I used.

Here’s how the mold looked right after I finished filling it. You can see the small spatula I used.

I was unsatisfied with how some of the earlier Legos had overflowed so I tried to smooth them out but I think that was a mistake. I wasn’t sure how long it would take to have the candy set so I looked it up online. Common consensus was that 20 minutes in the refrigerator should work. I thought you weren’t suppose to refrigerate melted chocolate but maybe candy melts are different. In any case, after 20 minutes I took it out and the Legos popped right out.

The finished product.

The finished product.

The detail is so fine you can even see the Lego logo on them.
Lego Candy 4

The first candies I filled tended to have air bubbles in spite of all the tapping I did. I think it’s because the candy wasn’t quite as liquid as it was at the end. Below is how it looks with the bubbles.
Lego Candy 5

All in all, I’m pretty happy with how they turned out. They’re definitely recognizable and I think they’ll work well on Calvin’s cake. Calvin’s birthday isn’t for a couple of weeks still but I’ll post pictures of the cake when it’s finished.

Calvin’s Tofu Loaf

Calvin is always very eager to “help” me in the kitchen. Usually I’m hurrying to try to get supper on the table and would rather not dance around him. However, I do try to set time aside to let him help me a couple of times a week. I view baking time with a preschooler as the mathematical equivalent of story time for literacy. I’m convinced that cooking or baking is a great way for kids to learn mathematical concepts.

Up to this point, I usually find the recipe we’re going to make, do any necessary prep, and then allow Calvin to dump the ingredients into the mixing bowl or pan. Calvin does enjoy dumping things in. However, he really would prefer that I give him more autonomy. For the last couple of weeks Calvin will dutifully dump ingredients in but then sneak off to the side and start making his own “recipes.” These are usually charming but inedible as he’s making due with whatever odds and ends are left on our counter1. This last week, I decided I should try to create a structure where Calvin could make the majority of the recipe decisions but we would hopefully end up with an edible product.

A couple of years ago I ran across The Magical Loaf Studio. Jennifer McCann is the author of two awe-inspiring cookbooks with recipes for vegan lunches. Her stuff is amazing. I’m completely intimidated by her adorable menus. Anyway, many years ago now she went to a vegetarian cooking class put on by an Adventist church. One of the things they handed out was instructions on how to create your own vegetarian loaf. One day when bored, Jennifer automated it and the Magical Loaf Studio was born. To be honest, I’m not that much into vegetarian loafs (and Jaeger believes they are evil). However, the setup seemed ideal to give Calvin a lot of options while still creating something that was edible-like.

Today Calvin and I tried the vegetarian loaf experiment. I pulled up the page and started out with the “protein” box. I pulled out every protein option that was listed in the box and that we had in the house and let Calvin choose which one he liked best. Predictably, he chose tofu. Then we moved on section by section until we got to the end. Calvin tried to get away without choosing any vegetable or seasonings but I insisted he select at least one. At last, we had a recipe:

Here’s Your Very Own Adventist-Style Vegan Dinner Loaf!

program created by Jennifer McCann for the Vegan Lunch Box Blog

Ingredients:

1/2 cup pecans
2 TB margarine
One large carrot, peeled and grated
2 cups mashed firm tofu
1 cup cooked quinoa
1/4 to 1/2 cup tomato juice, as needed
1/2 cup cooked oatmeal
2 TB nutritional yeast flakes
1 tsp. salt
Directions:

Preheat the oven to 350º. Spray a loaf pan or 8×8 square baking pan
with nonstick spray and set aside (an 8×8 pan makes a crisper loaf).

Grind the pecans into a coarse meal using a food processor or
spice/coffee grinder. Place in a large mixing bowl and set aside.

Sauté any vegetables you’ve chosen in the margarine until soft. Add to
the large mixing bowl along with all the remaining ingredients. Mix
and mash together well, adding only as much liquid as needed to create
a soft, moist loaf that holds together and is not runny (you may not
need to add any liquid if the grains and protein are very moist). Add
more binder/carbohydrate as needed if the loaf seems too wet.

Press mixture into the prepared pan and bake for 45 minutes to 1 hour,
or until cooked through.

Let the loaf cool in the pan for 10 to 15 minutes, then turn out onto
a plate or platter and slice. Serve with potatoes, vegetables, and
vegetarian gravy, if desired.

Cold leftover slices of make a great sandwich filling.

I had told Jaeger yesterday that for dinner tonight we were going to have a recipe that Calvin created. However, I believe he hoped I was kidding. Jaeger was not amused to come home and discover that we really were having a Calvin concoction. To be honest, it wasn’t particularly good. Calvin only took a couple bites of it though Jaeger and I both ate reasonable servings. The recipe could have used a lot more seasoning and potentially more baking (I’m not entirely sure what the texture was suppose to be like). However, it was certainly edible.

I’m not sure I want to try the loaf generator again with Calvin. I’m certain good recipes can be made from it but it probably takes a lot more cooking intuition than Calvin has at the moment. So, I wouldn’t call this experiment a disaster but neither was it a success.

Maybe Calvin would feel more in control if he got to choose the recipe. He does own a cookbook specifically for children that I caught him looking through one night when he was allegedly going to bed.

We’ll figure out something, eventually.

  1. Calvin is always very careful not to add eggs to his recipes, and tell me he’s not adding eggs, as he likes to taste them and knows you “can’t” taste raw food once eggs have been added

This Week’s Menu

Ever noticed that every so often I get serious about my grocery store habit? I’m once again trying to cut back. Also, I’m trying to get rid of all the extra ingredients I have around our house so I don’t have to move or trash them. I’ve decided to go ahead and cook all my dried beans and then freeze them. I use dried beans fairly often but sometimes run out of time so I grab the canned ones. However, freezing works well when I’m organized enough to do it. My slow cooker lets me cook them without paying too much attention to the process.

You’ll notice that both Brussels sprout and asparagus are still on the menu even though they’re high cost vegetables. That’s because they’re one of three vegetables Calvin consistently eats, the other being broccoli. He refuses to touch sweet potatoes though I keep trying. Yes, our child is weird.

  • Sunday – Sicilian Lentil Soup
  • Monday – Aloo Gobhi with Naan
  • Tuesday – Garbanzo Pot Pie with Broccoli
  • Wednesday – Southern Style Black Eyed Peas, Toasted Millet, and Brussels sprout
  • Thursday – Leftovers
  • Friday – Chick peas with a coconut sauce and asparagus
  • Saturday – Spaghetti with Edamame and bread

Menu this Week

Someday I’m going to post more than just menus. However, this will have to wait till Calvin goes back to a normal sleep routine . . .

  • Sunday: “Curried Squash Soup” from The Roasted Vegetable by Andrea Chesman with Steamed Asparagus and Bread
  • Monday: “Millet and Chickpea Pilaf with Saffron and Tomatoes” from Vegetarian Cooking for Everyone by Deborah Madison with Stuffed Acorn Squash and Halloween Candy (Double the Millet dish for freezing)
  • Tuesday: Takeout
  • Wednesday: “Ratatouille” from Moosewood Cookbook by Mollie Katzen (double for freezing)
  • Thursday: Leftovers
  • Friday: Braised Tofu with Wild Rice and Edamame in the Pod
  • Spinach and Cheese Ravioli with Broccoli

Menu this Week

  • Sunday: Been Burritos (made extra to freeze)
  • Monday: Garbanzo Pot Pie with Green Beans
  • Tuesday: Takeout
  • Wednesday: “Thai Tofu & Winter Squash Stew” from Vegetarian Cooking for Everyone by Deborah Madison (try making double portion and freezing)
  • Thursday: Leftovers
  • Friday: “Tossed Spinach Lasagne & Goat Cheese Gratin” from Vegetarian Cooking for Everyone by Deborah Madison (try making double portion and freezing)
  • Saturday: Store-bought Ravioli or Spaghetti and Edamame